
Shader Tab
General Use
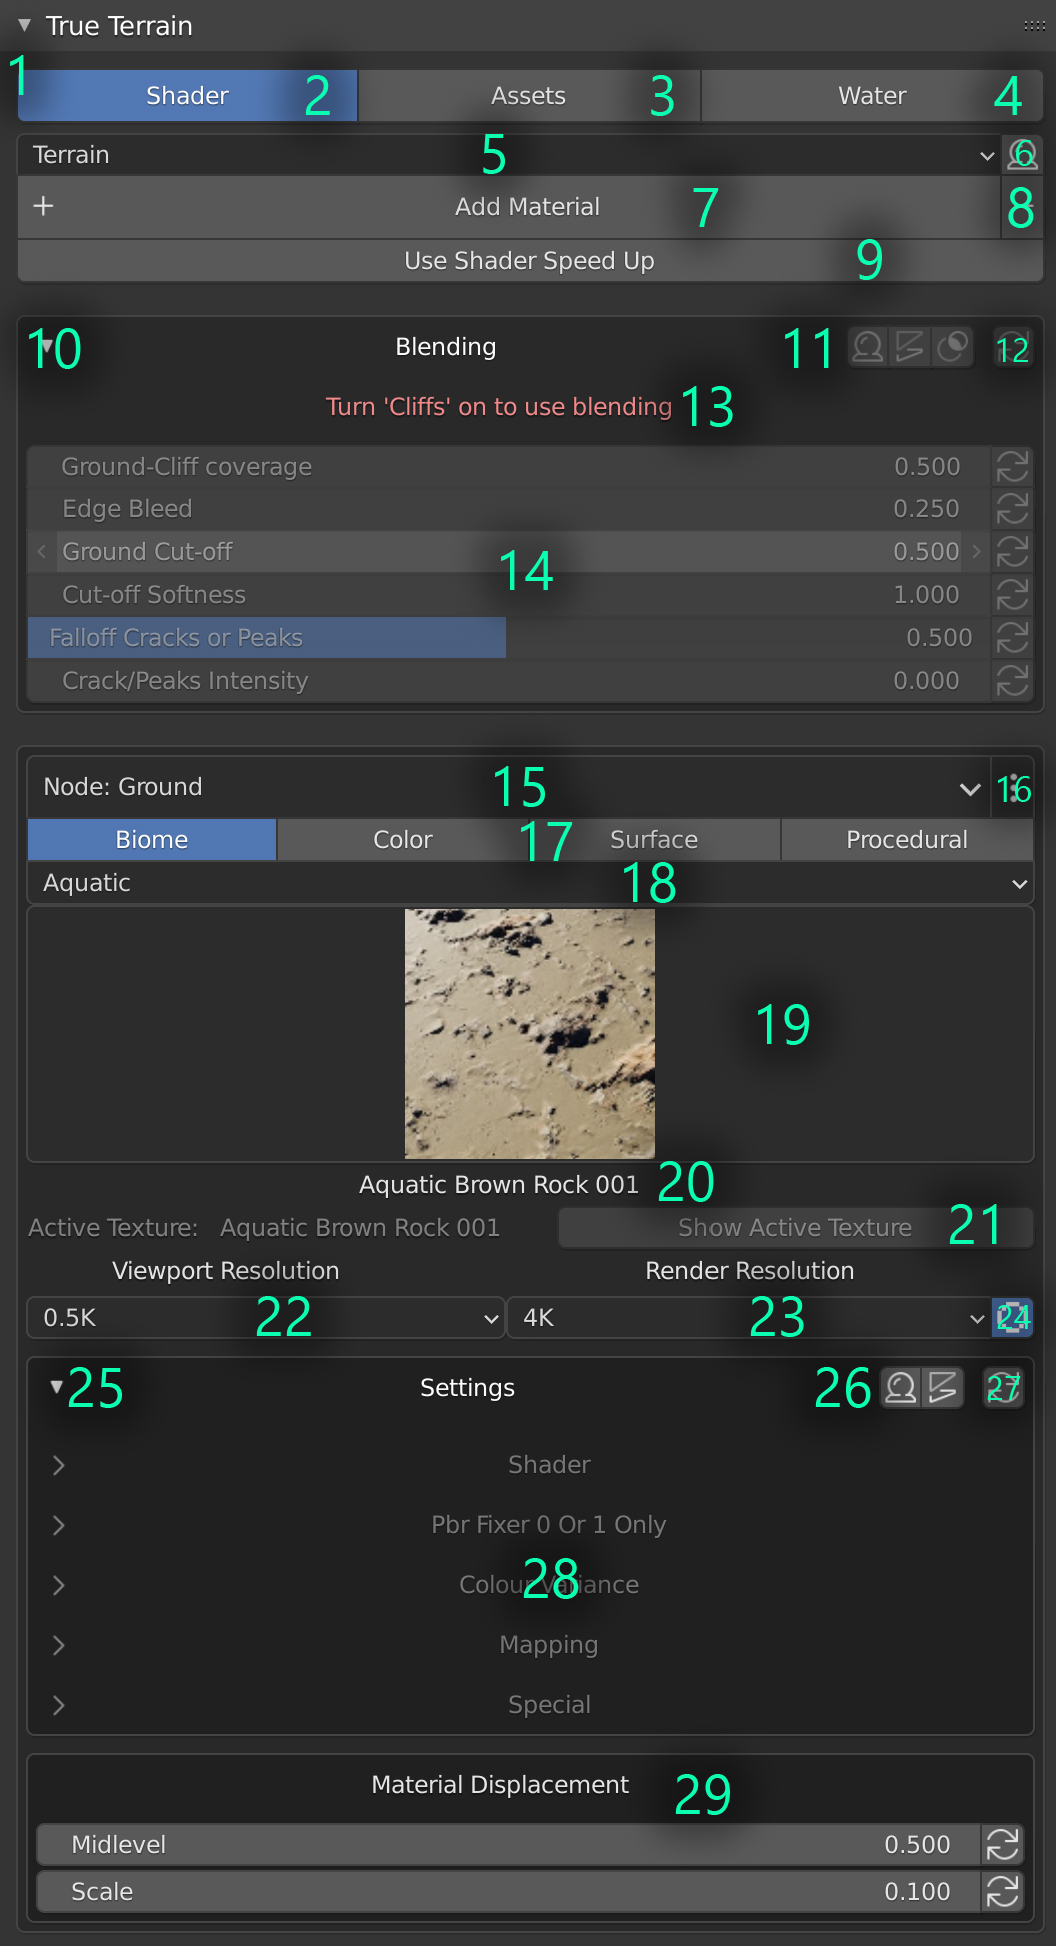
Layout of the Shader Tab
- Workspace Tab, change between terrain shading, assets, and water
- See Shader section
- See Assets section
- See Water section
- Change True Terrain material
- Preview Material
- Add a Material
- Remove current material
- Use Shader Speed Up
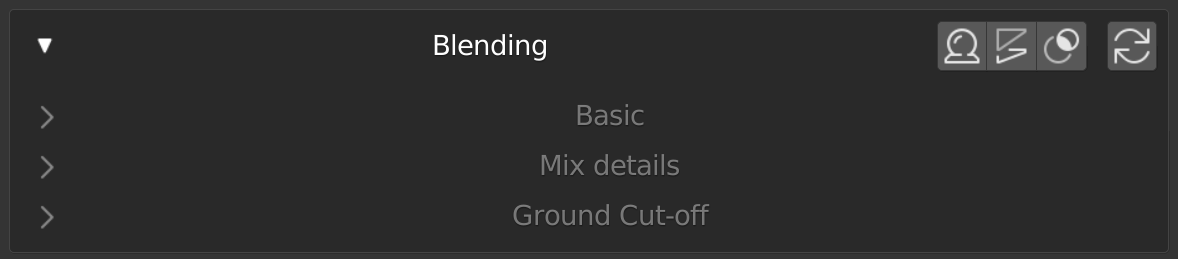
- Blending Section Used for mixing Ground and Cliffs nodes. Only enabled if Cliffs are enabled.
- Blending Node Previews
- Reset all Blending settings to defaults
- Explanation of why this section is disabled. Only visible if Cliffs is disabled
- Blend Settings
- Texture Node Selector
- Select node to see its settings
- Texture Node Menu
- Node Main Category
- Node SubCategories
- Icon Picker
- Name of current icon in Icon Picker
- Show Active Texture
- Viewport Resolution
- The texture resolution to use in the viewport
- Render Resolution
- The texture resolution to use when rendering
- Texture Resolution Proxy
- When enabled a different resolution is used when rendering
- Show Settings
- Clicking anywhere between the triangle icon and the label will show/hide the settings
- Active Node’s Preview Buttons
- Reset all node settings to Defaults
- Node’s settings
- Material Displacement
- The displacement settings of the entire material. This will not change when selecting other nodes
- Blend Settings NOT PICTURED
- Only visible if the secondary node is active or node is Shoreline
- The settings to blend between the main and secondary nodes
- Texture Resolution NOT PICTURED
- Only visible if the Texture Resolution Proxy is not enabled
- The resolution of the texture
Initial Settings

The Material Dropdown (currently set to “Terrain”) will allow you to switch to another True Terrain material on this object.
“Add Material” will add another True Terrain material to this object.
Remove Material (“-” right of “Add Material”) will remove the current True Terrain material.
“Use Shader Speed Up” enables a node group that ignores any face not visible to the camera. May result in less realistic rendering, though typically unnoticeable to the eye.
Preview Node
The following explanations are in the order of the buttons below from the left to the right. These symbols are universal:
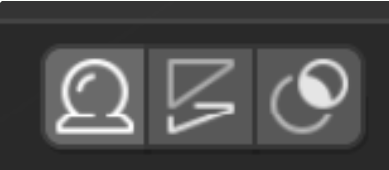
- Preview Shader
- Clicking this button will preview the material from this node
- Preview Displacement
- Clicking this button will preview the displacement from this node
- Preview Mask
- Clicking this button will preview the blending mask from this node
Clicking any of these buttons when active (are highlighted blue) will toggle the preview back previewing the entire material (this may or may not change what you see depending on what you have enabled and what you were previewing)
Reset to Defaults
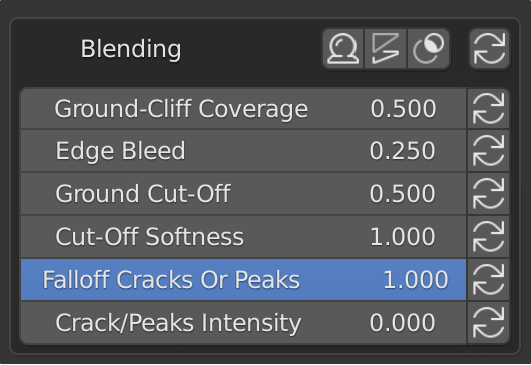
- If the Reset to Default button is connected to a value input it will reset the value to its default setting in its group node
- If the Reset to Default button is next to a title or it will reset all of the values in its section
Selecting Textures
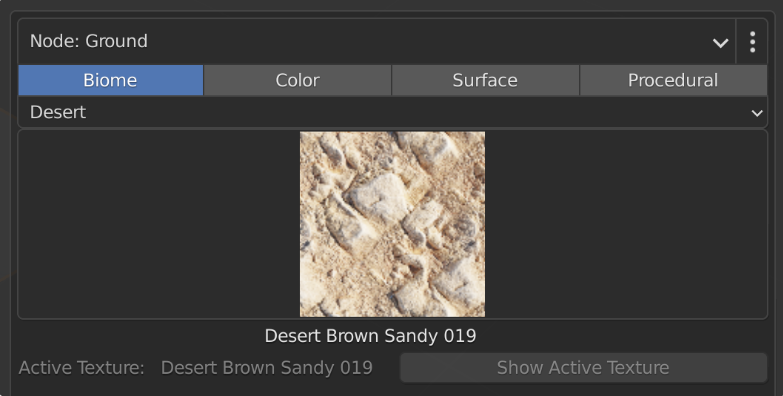
- Select Node - select other nodes to add to your landscape
- Ground: is the base and cannot be disabled so if you want an only cliff texture use this node despite if being named “Ground”
- Ground - Secondary: a secondary base node for adding another texture to mix/blend with your main base. Add in dirt patches or rocky areas with this node.
- Cliffs: Use this node to place a texture only on areas of a mesh that are more vertical than horizontal (ie. cliffs). Enabling Cliffs also enables the “Blending” settings (see below)
- Cliffs - Secondary: a secondary cliff node for adding another texture to mix/blend with your main cliff node. Add in another rock texture to break up potential repetitive textures (see the section below for other anti-tile settings)
- Shoreline: Use this node to place a certain texture around a height of 0
- Snow: Use this node to place a snow shader across your landscape
- Select Category
- Biome, Color, Surface: These categories will all list the same textures but in different subcategories for easy finding of textures with certain features in common
- Procedural: This category has non-texture based shaders (see )
- Select Texture/Procedural Shader
- Biome, Color, Surface: A secondary category menu will be given directly below the main categories (“Desert” is selected currently in the example image above).
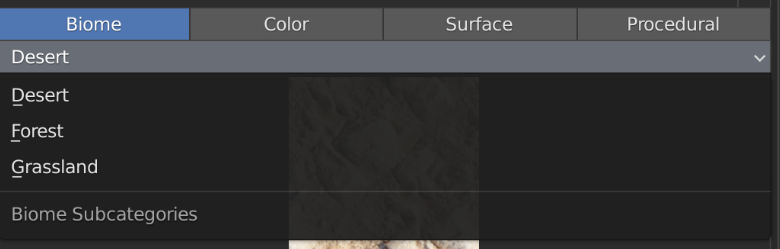
- Select a subcategory to view textures with the given quality of the subcategory.
- Click on the icon picker (the image) to view all textures within the selected subcategory. Click on a texture to apply it to your landscape and to see its settings
- Procedural: Click on the icon picker (the image) to view all procedural shaders. Click on an image to apply it to your landscape and to see its settings.
- Select Resolution (if available)

- If you have installed a texture pack you may have resolutions you can decide between. Selecting a resolution will update the texture’s resolution
- You can also turn on the proxy system (the pixelated circle to the right of the resolution menu) to have one texture resolution in the viewport and one while rendering to help preview performance in the viewport

Mixing Textures
If you have both the main node and its secondary node (Ground and Ground - Secondary or Cliffs and Cliffs - Secondary) enabled you will see the Blend Settings section.
This section gives you options on how the two nodes, the main and its respective secondary, are mixed together. Shoreline will always have this section visible. Snow has it built into its main settings. (See Patch Mixing, Strata Mixing, Shoreline Mix, and Snow)
Texture Node Menu
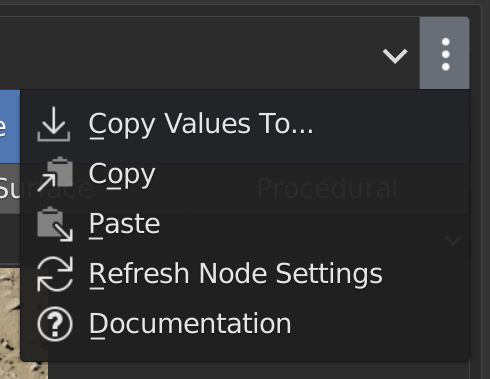
Copy Values To…
Copy to a node from the same material

- Copy the active node settings to another node of the same material
- Can copy to other texture nodes including ones that are currently procedural if copy textures is on
- Can only be copied to snow nodes on other materials
- Copy Textures: Copy the active texture over to the destination node
- Destination Node: The node from the same material to copy settings (and textures if enabled) to
Copy to a node of a different True Terrain material
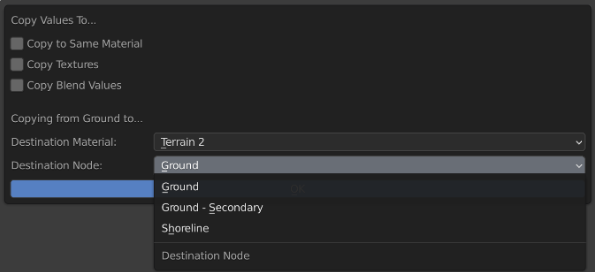
Copy the active node settings to a node of another True Terrain material
- Copy Textures: Copy the active texture over to the destination node
- Destination Material: The material from which to find the node to copy to
- Destination Node: The node from the destination material to copy settings (and textures if enabled) to
Copy Blend Values
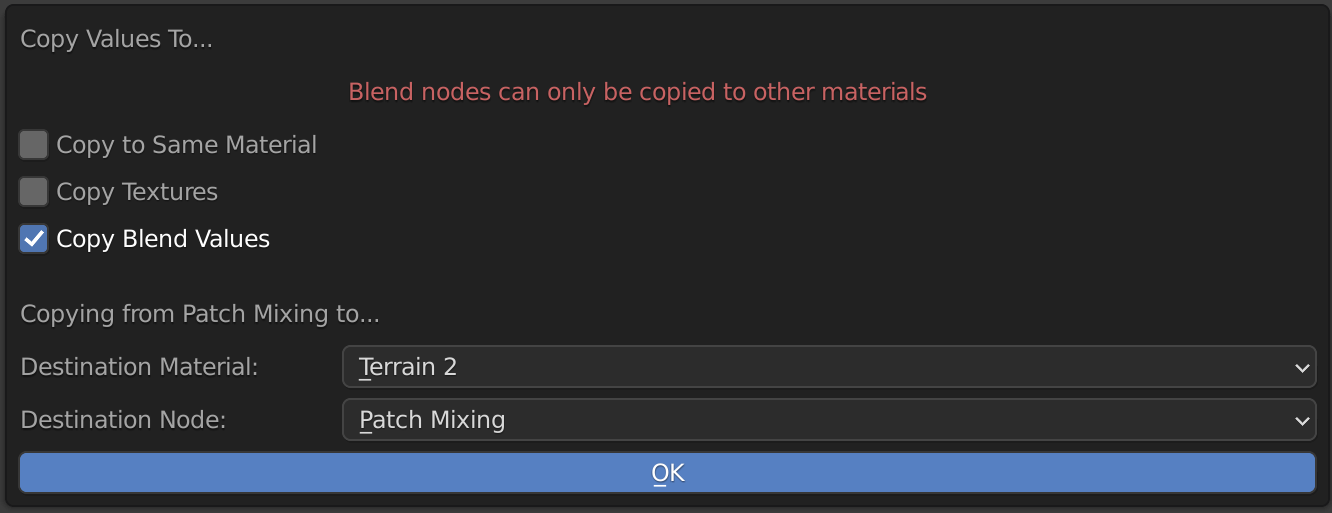
- Copy Blend Values copies the blend node values of the active node to the exact same group node type of another material.
- It must be another material as each blend node that mixes the other Texture/Procedural nodes is distinct from the other blend nodes in its respective material. So you must go to another material to find a group node that has the exact same settings.
- You cannot copy textures to blend settings.
WARNING: If you see the above message in red but don’t see the “Copy Blend Values” toggle, turn off the “Copy to Same Material” toggle.
Copy
Copy Node Settings

- Copy the active node settings to a copy buffer. Go to another node on this material or another of the same type to paste the settings.
- Can copy to other texture nodes including ones that are currently procedural if copy textures is On
- Can only be copied to snow nodes on other materials
- Copy Textures: Copy the textures along with the settings
Copy Blend Settings
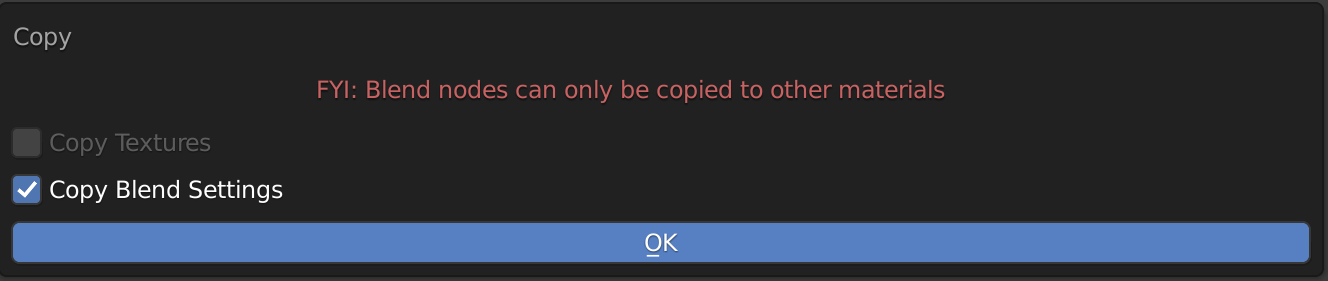
- Copy Textures: There aren’t textures to copy with blend nodes
- Copy Blend Settings: if on this will copy the blend settings
Paste
- Paste copied settings onto active node
Miscellaneous
Show Active Texture
- Clicking this button will show the texture that this node is currently using in the Icon Picker
- The name of the node’s texture is to the left of this button
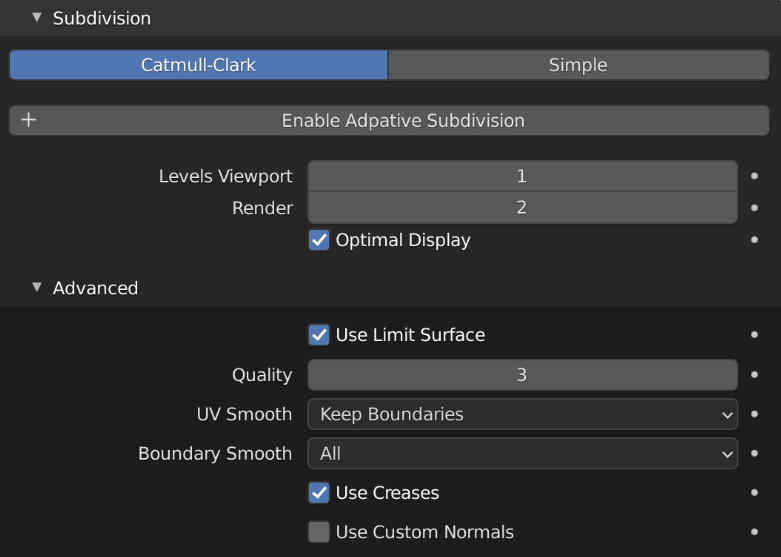
Subdivision Panel
Base Subsurface Options:

- Add Subsurface Modifier
- Adds a subsurface modifier and displays the settings here:
Adaptive Subdivision
As of blender 3.0 Adaptive Subdivision no longer will subdivide scattered assets and so the Enable Adaptive Subdivision button is no longer needed.
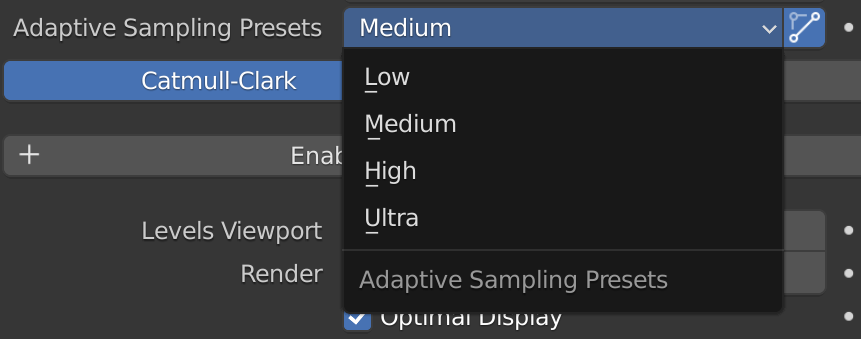
Adaptive Sampling Presets: Choosing a preset will change the scene's Adaptive Subdivision settings and the scene's Simplify settings if Change Simplify is on.