
Assets
General Use
Select an Asset Category
Select one of the asset categories to load the relevant asset picker. You can add more assets in the Addon Preferences with Import Assets.
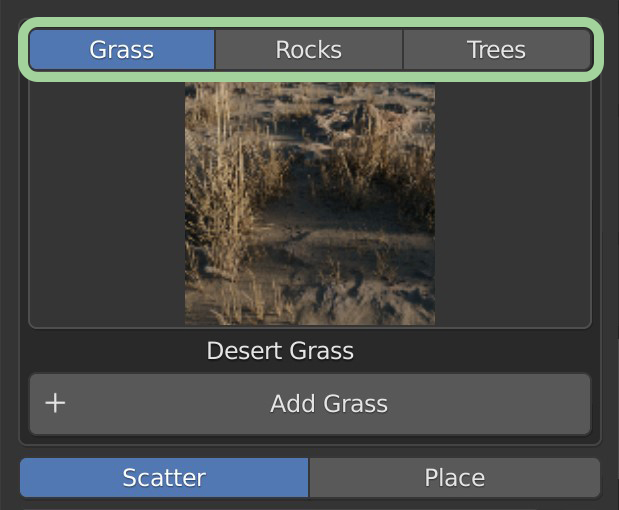
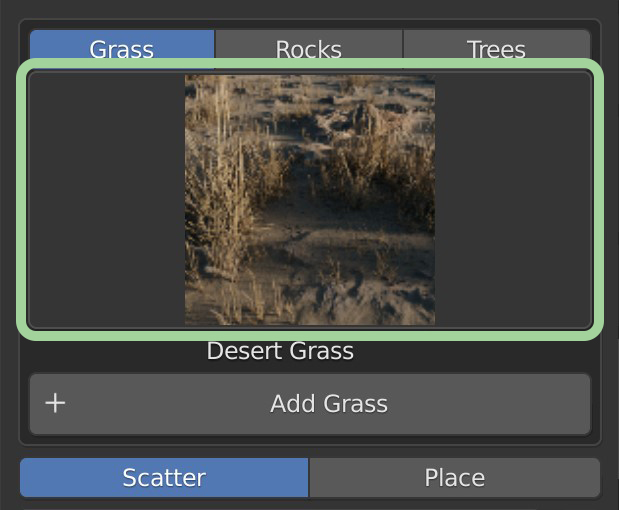
Select an Asset
Choose an asset from the asset picker.
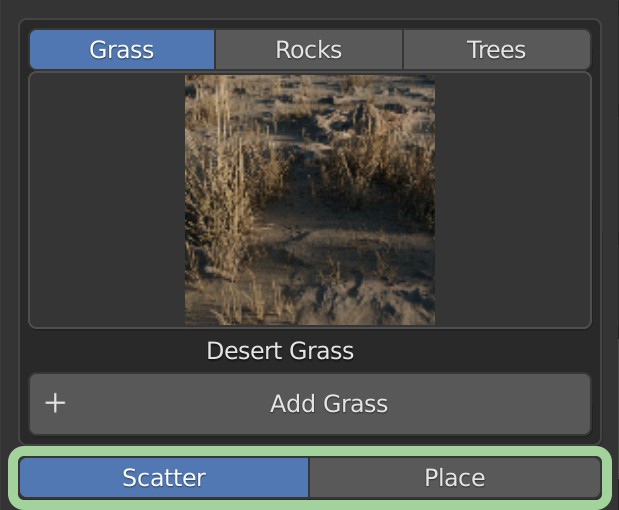
Select an Asset Add Type
Select between Scatter and Place
Choose Defaults
If your Asset Add Type is Scatter you can enable and choose any defaults you have saved. See Defaults.
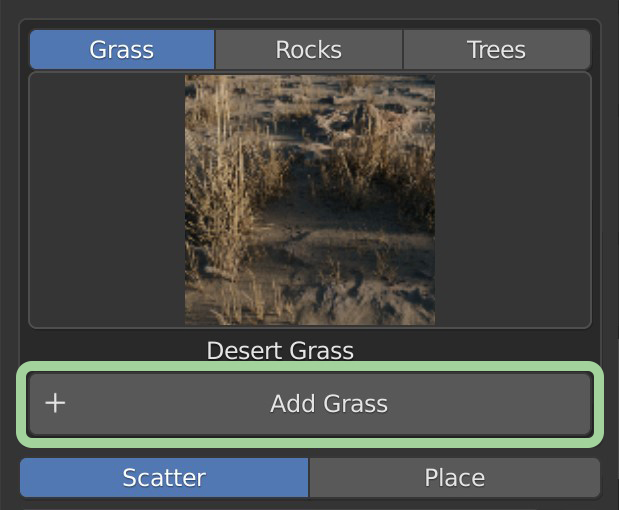
Add Asset
Click Add *Asset Type* to add the selected asset
Mess with the Settings
Select the Scatter option from the asset settings tabs and change the assets scattering settings to your liking
Add Modifiers
Select the Modifiers option from the asset settings tabs and add some modifiers to increase performance or realism
Change the Look
Select the Shader option from the asset settings tabs and change the settings to customize and make unique each asset to your scene
Turn off Outline Selected in order to remove the orange outline and see your assets and scene better
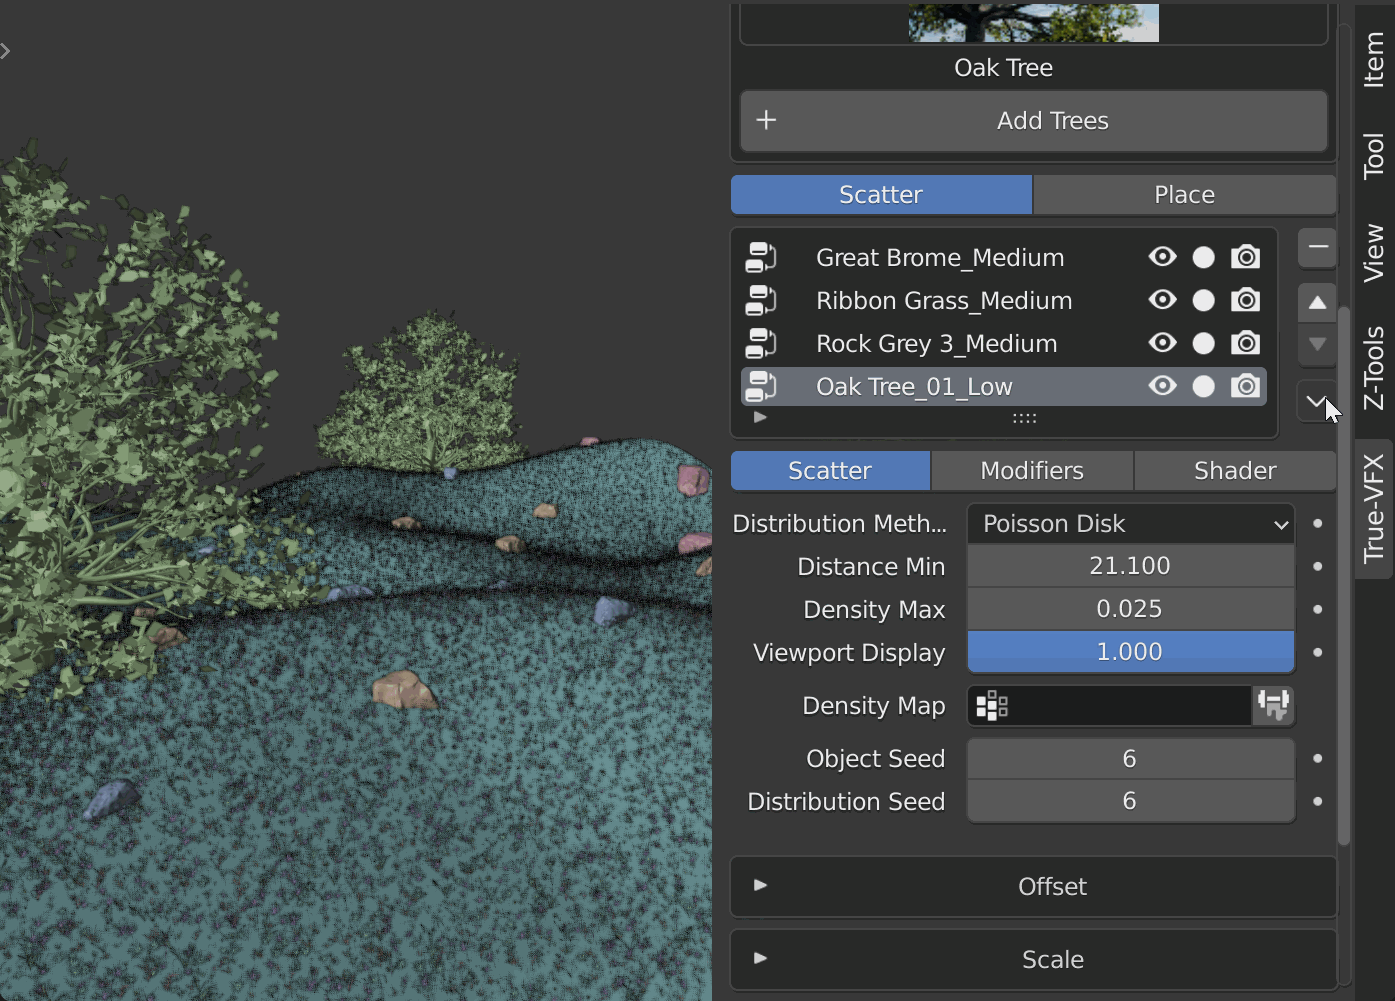
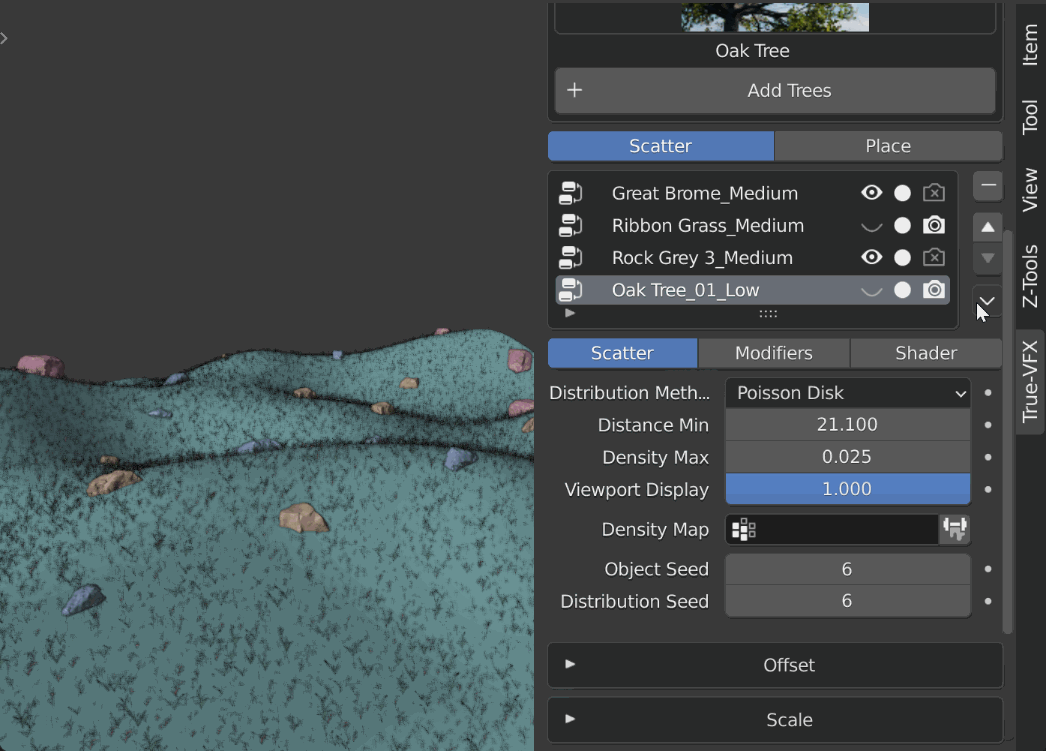
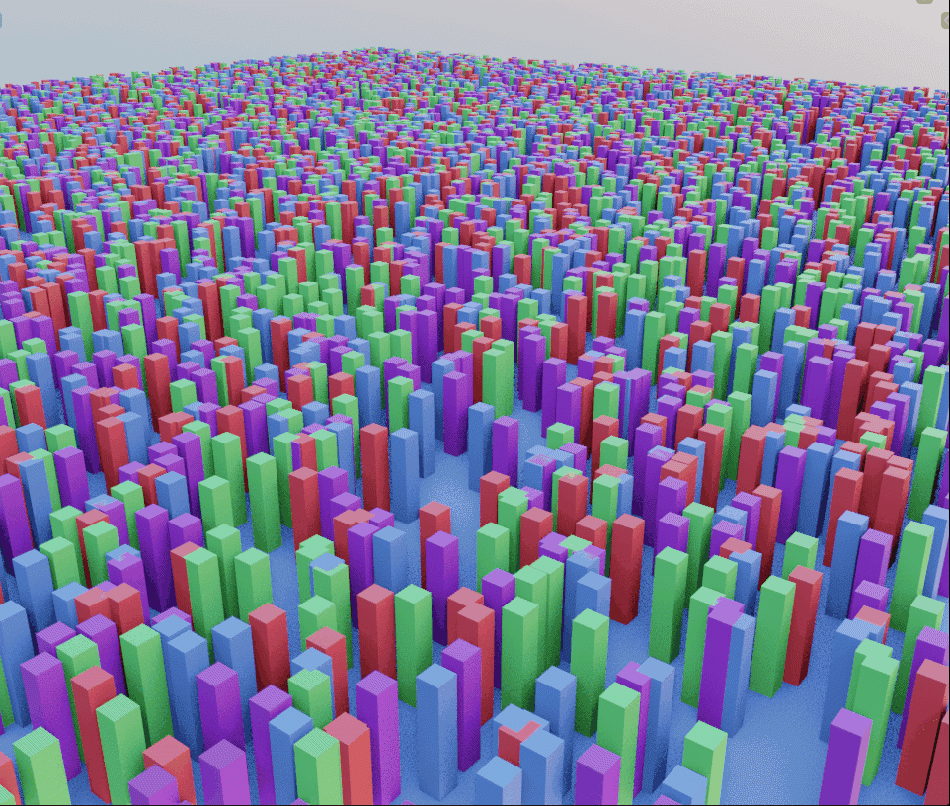
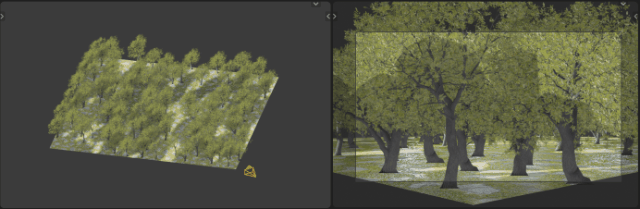
Scatter
Scatter the chosen asset across the selected object.
Active Scatter System
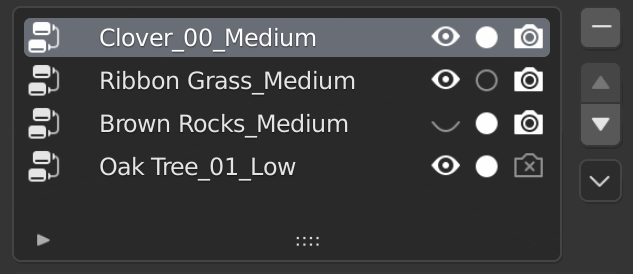
The Active Scatter System panel displays all scatter systems you have on the selected object.
The highlighted scatter system is the active system and is the system that the settings below will affect
Asset Visibility
Viewport Visibility
Hide or display active scatter system in the viewport (affects viewport rendering)
Show Asset Object
Display either the active asset or just simple spheres for viewport performance
Render Visibility
Hide or display active scatter system when rendering
Remove Scatter System
Remove the active scatter system

Move Scatter System
Clicking the up and down arrows will move the active scatter system up or down respectively.

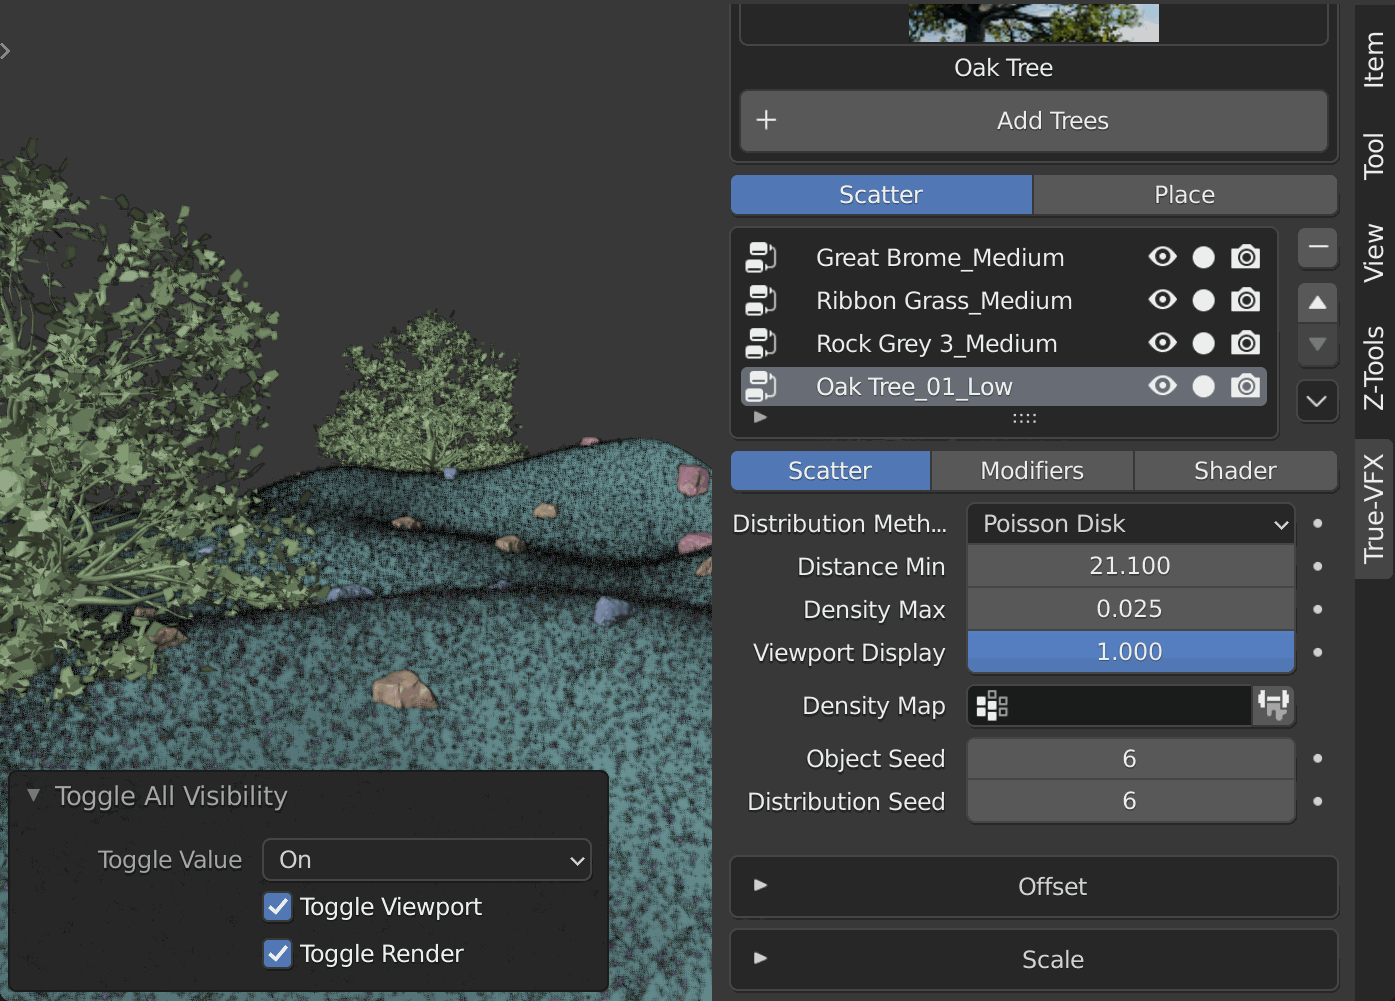
Scatter System Menu
Toggle All On
Toggle all scatter systems on in the viewport and renderings respective of the options. Toggle options are within a secondary menu called Visibility as of v4.1
Toggle All Off
Toggle all scatter systems off in the viewport and renderings respective of the options. Toggle options are within a secondary menu called Visibility as of v4.1
Invert Visibility
Invert all scatter system toggles in the viewport and renderings respective of the options. Toggle options are within a secondary menu called Visibility as of v4.1
Toggle Options
Decide whether to toggle both in the viewport and renderings or only one. The panel appears bottom left of area after clicking one of the toggle functions ("Toggle All On", "Toggle All Off", "Invert Visibilities").
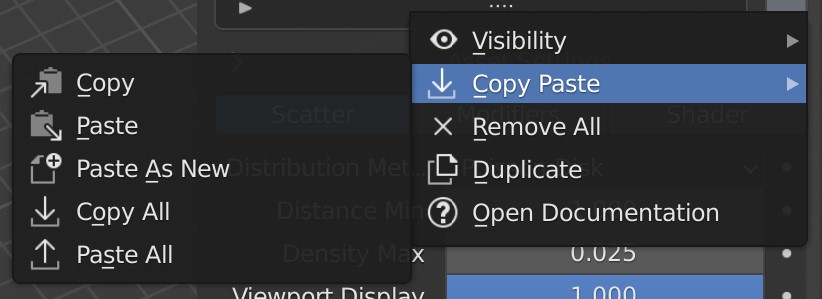
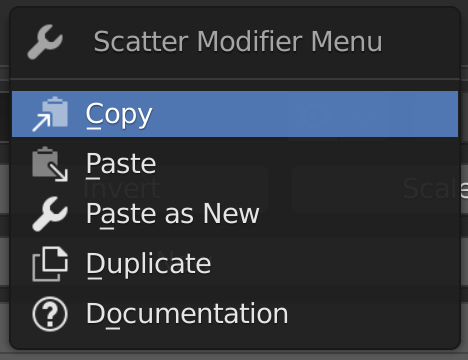
Copy: Copy the active scatter system (disabled if no scatter systems have been added to the selected object)
Paste: Paste the copied scatter system (disabled if no scatter system has been copied yet or no scatter systems have been added to the selected object)
Paste As New: Past the copied scatter system as a new scatter system. (disabled if no scatter system has been copied yet)
Copy All: Copy all scatter systems on the selected object. (disabled if no scatter systems have been added)
Paste All: Paste all copied scatter systems, removing any existing scatter systems. (disabled if no scatter systems have been copied)
Remove All: Remove all scatter systems from this object
Duplicate: Make a new scatter system copied from the active scatter system
Open Documentation: Open this documentation concerning scatter systems
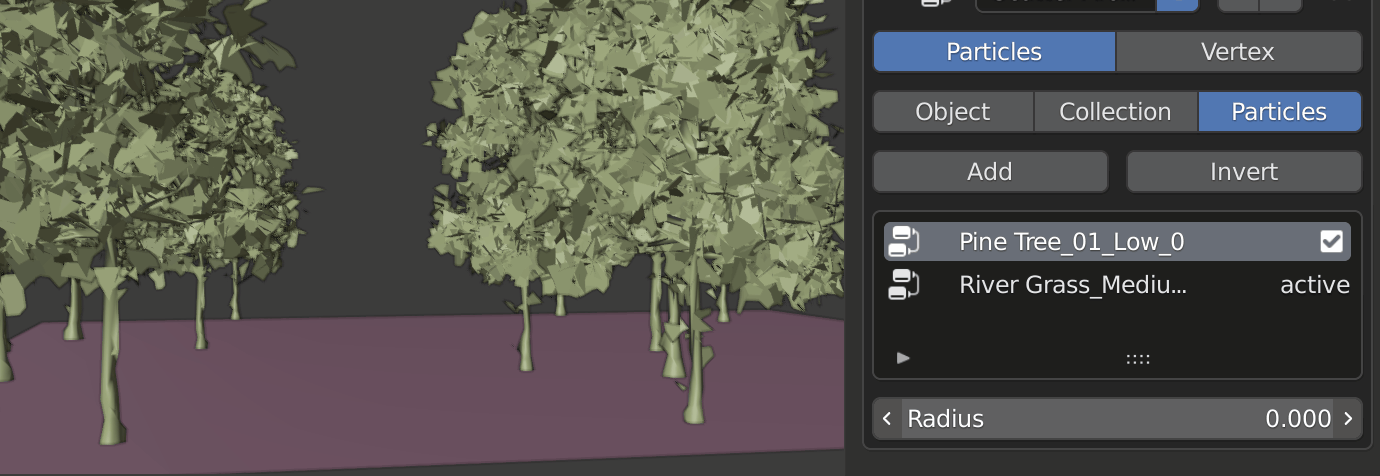
Scatter Settings: Particles
See Particle System Panel from Blender's Manual
Scatter Settings: Geometry Nodes
----- Asset Settings -----
Change Asset: Change the asset that is being scattered
- Category: The category of assets to change to (does not change the asset)
- Asset Picker: Pick the asset to change to. Clicking a new asset here will change the asset. It will also update the name of the scatter system if the setting is turned on in the Addon Preferences
- Edit Asset: Quickly edit the asset in the viewport
- Open Asset Blend File Toggle: Open the active asset's blend file when clicking Edit Asset. Will use the Render Quality setting if proxy is turned on which will not open what is seen in the viewport. THIS WILL CHANGE THE ASSET FOR ALL FUTURE IMPORTS AND ASSET IMPORTED AS LINKED
Quality Settings: Change the quality settings
- Quality Level: The Quality Level to use. (becomes the viewport quality level proxy when Quality Proxy is turned on)
- Quality Proxy: Use a different quality level of the asset in the viewport than when rendering (usually a lower level to save on performance)
- Render Quality Level: The Quality Level to use when rendering. (only visible and used if Quality Proxy is active)
- Particle Display Amount: Change how many particles are displayed on the asset. Used usually for leaves on trees. (only visible if the asset has a particle system)
----- Base Scatter Settings -----
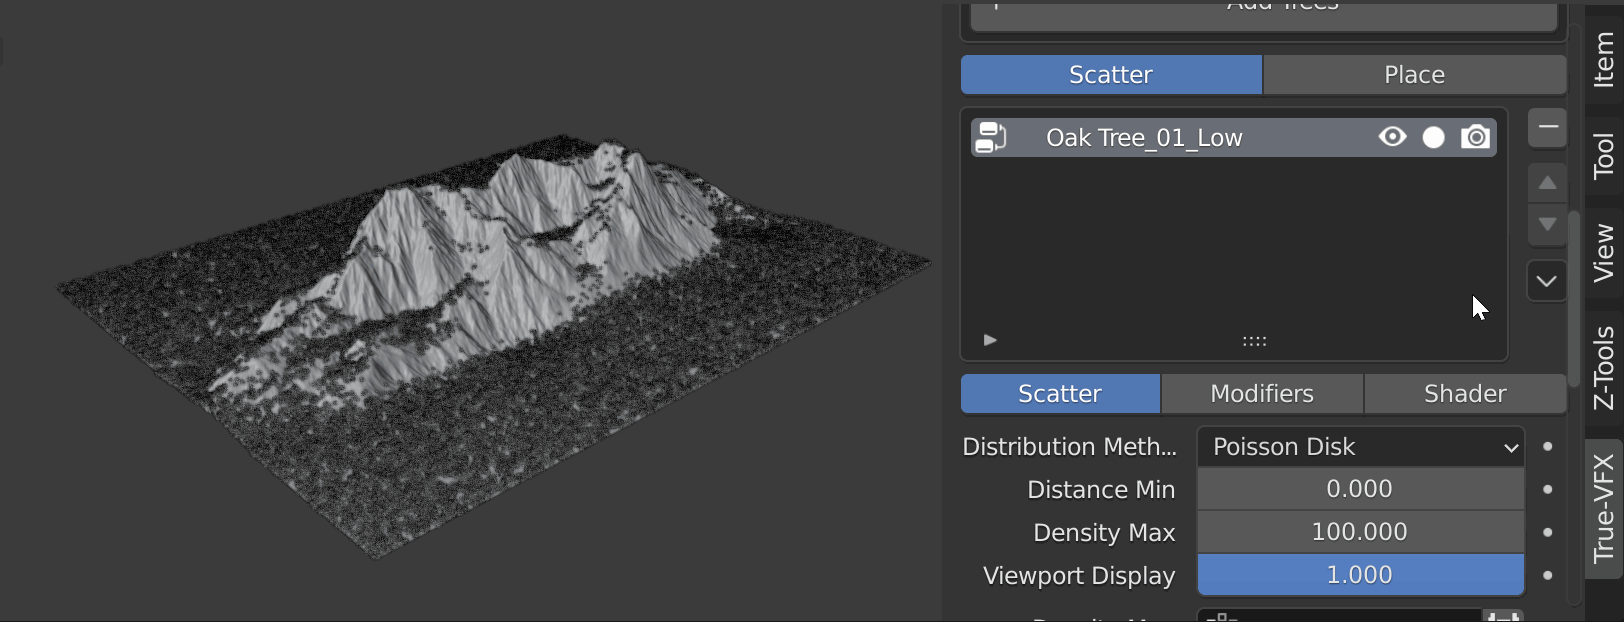
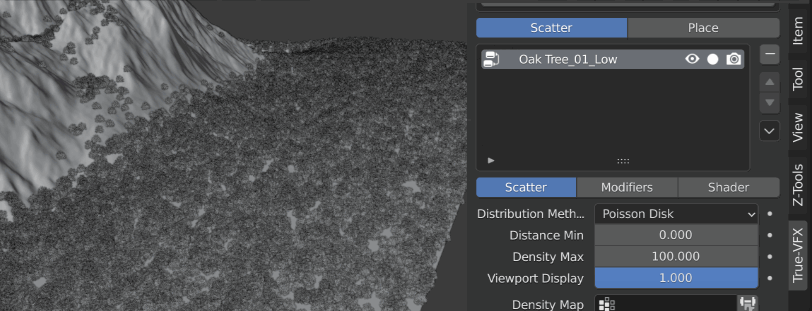
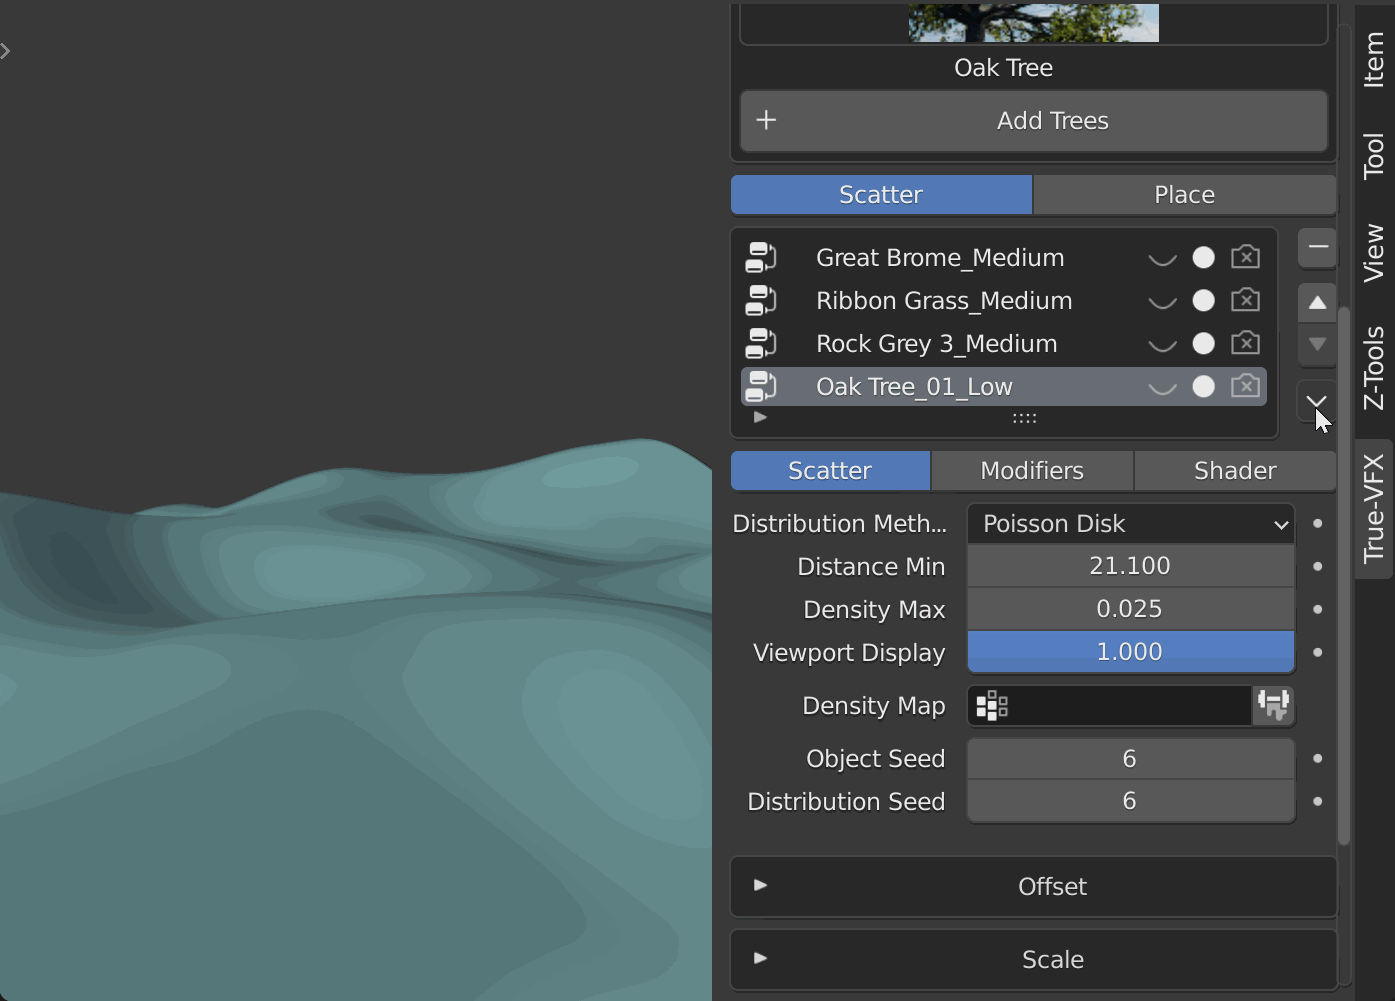
Distribution Method: The way the assets are scattered
Random: Distribute assets randomly on the surface. This is the fastest distribution method.
Poisson Disk: Distribute assets randomly on the surface while taking a minimum distance into account. (When this method is active Distance Min is visible)
Distance Min: The minimal distance assets can have to each other. This option is only available with the Poisson Disk distribution method.
Density Max: The asset density for the distribution. The units are the number of points per square meter.
This will be capped on distributions by the Distance Min option. If the density is greater than what the minimal distance allows, no new points will be added after this threshold has been passed.
Viewport Display: Amount of assets to display in the viewport. 0.0 = 0% while 1.0 = 100% of the assets. Will not affect the amount of assets rendered.
Density Map: Choose a vertex group/weight map to limit where the assets are scattered
Invert Density Map: Invert the active Density Map
Setup Weight Paint: Creates a new vertex group/weight map or uses the active Density Map if exists and enters Weight Paint mode for quick Density Map creation.
Object Seed: The seed that affects the choice of the assets. Some assets come with multiple variants to reduce repetitiveness. This seed will change which variant is at what location randomly. If there are no variants, changing this seed does nothing. Automatically increments when a scatter system is created to avoid repeated scatter systems.
Distribution Seed: The random seed to use when generating distribution points. Changing this will affect the location of each asset in the active scatter system. Automatically increments when a scatter system is created to avoid repeated scatter systems
----- Offset Settings -----
Show Offset Settings: Clicking the top section (where the "Offset" title and arrow icon are) will toggle the Offset Settings visibility
(Min) Offset: The base amount to offset each asset. If (Offset) Randomize is greater than 0 this value becomes the minimum amount an asset can be offset when randomized.
Max Offset: The max amount to offset each asset. Only enabled if (Offset) Randomize is greater than 0.
(Offset) Randomize: The amount to randomize the offset amount for each asset
(Offset) Randomize Seed: The seed to use when randomizing the offset. Changing this value will change how much each asset is randomly offset. Automatically increments when a scatter system is created to avoid repeated scatter systems
----- Scale Settings -----
Show Scale Settings: Clicking the top section (where the "Scale " title and arrow icon are) will toggle the Scale Settings visibility
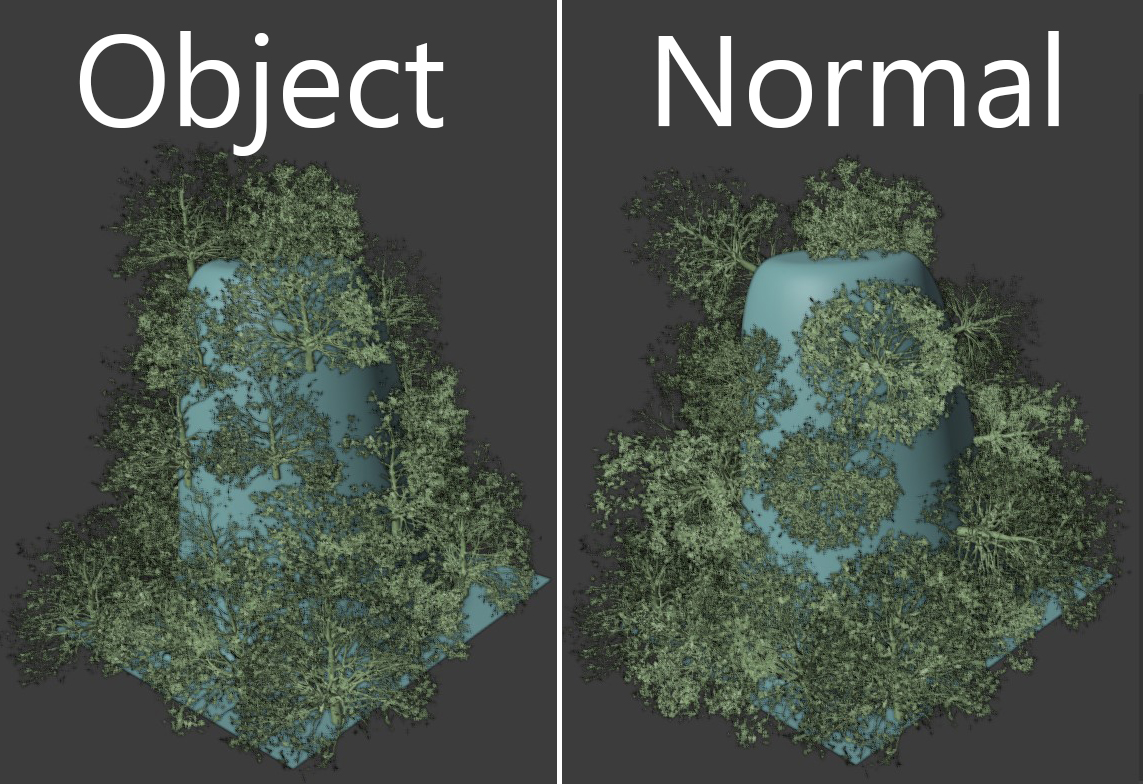
Scale Base: What the scale values start at.
- World: Objects do not scale with the object, but instead just spread out (see example)
- Object: Objects scale with the object
Min Scale: The smallest an asset can be when randomized. Only enabled if (Scale) Randomize is greater than 0.
Max Scale: The base amount to scale each asset. If (Scale) Randomize is greater than 0 this value becomes the largest an asset can be scaled when randomized.
(Scale) Randomize: The amount to randomize the scale amount for each asset
(Scale) Randomize Seed: The seed to use when randomizing the scale. Changing this value will change how much each asset is randomly scaled. Automatically increments when a scatter system is created to avoid repeated scatter systems
----- Rotation Settings -----
Show Rotation Settings: Clicking the top section (where the "Rotation" title and arrow icon are) will toggle the Rotation Settings visibility
Orientation: What to align assets to
- Object: Base rotation matches its object's rotation
- Normal: Base rotation matches the normal of the face each asset is on
Rotation: Rotate each asset according to its orientation
Min Rotation: The minimum amount from the base rotation to be randomly rotated. Units in degrees. Only enabled if (Rotation) Randomize is greater than 0. Default is -180°.
Max Rotation: The maximum amount from the base rotation to be randomly rotated. Units in degrees. Only enabled if (Rotation) Randomize is greater than 0. Default is 180°.
Axis to Randomize: The (Euler) axis to randomize
(Rotation) Randomize: The amount to randomize the rotation amount for each asset
(Rotation) Randomize Seed: The seed to use when randomizing the rotation. Changing this value will change how much each asset is randomly rotated. Automatically increments when a scatter system is created to avoid repeated scatter systems
----- Clumping Settings -----
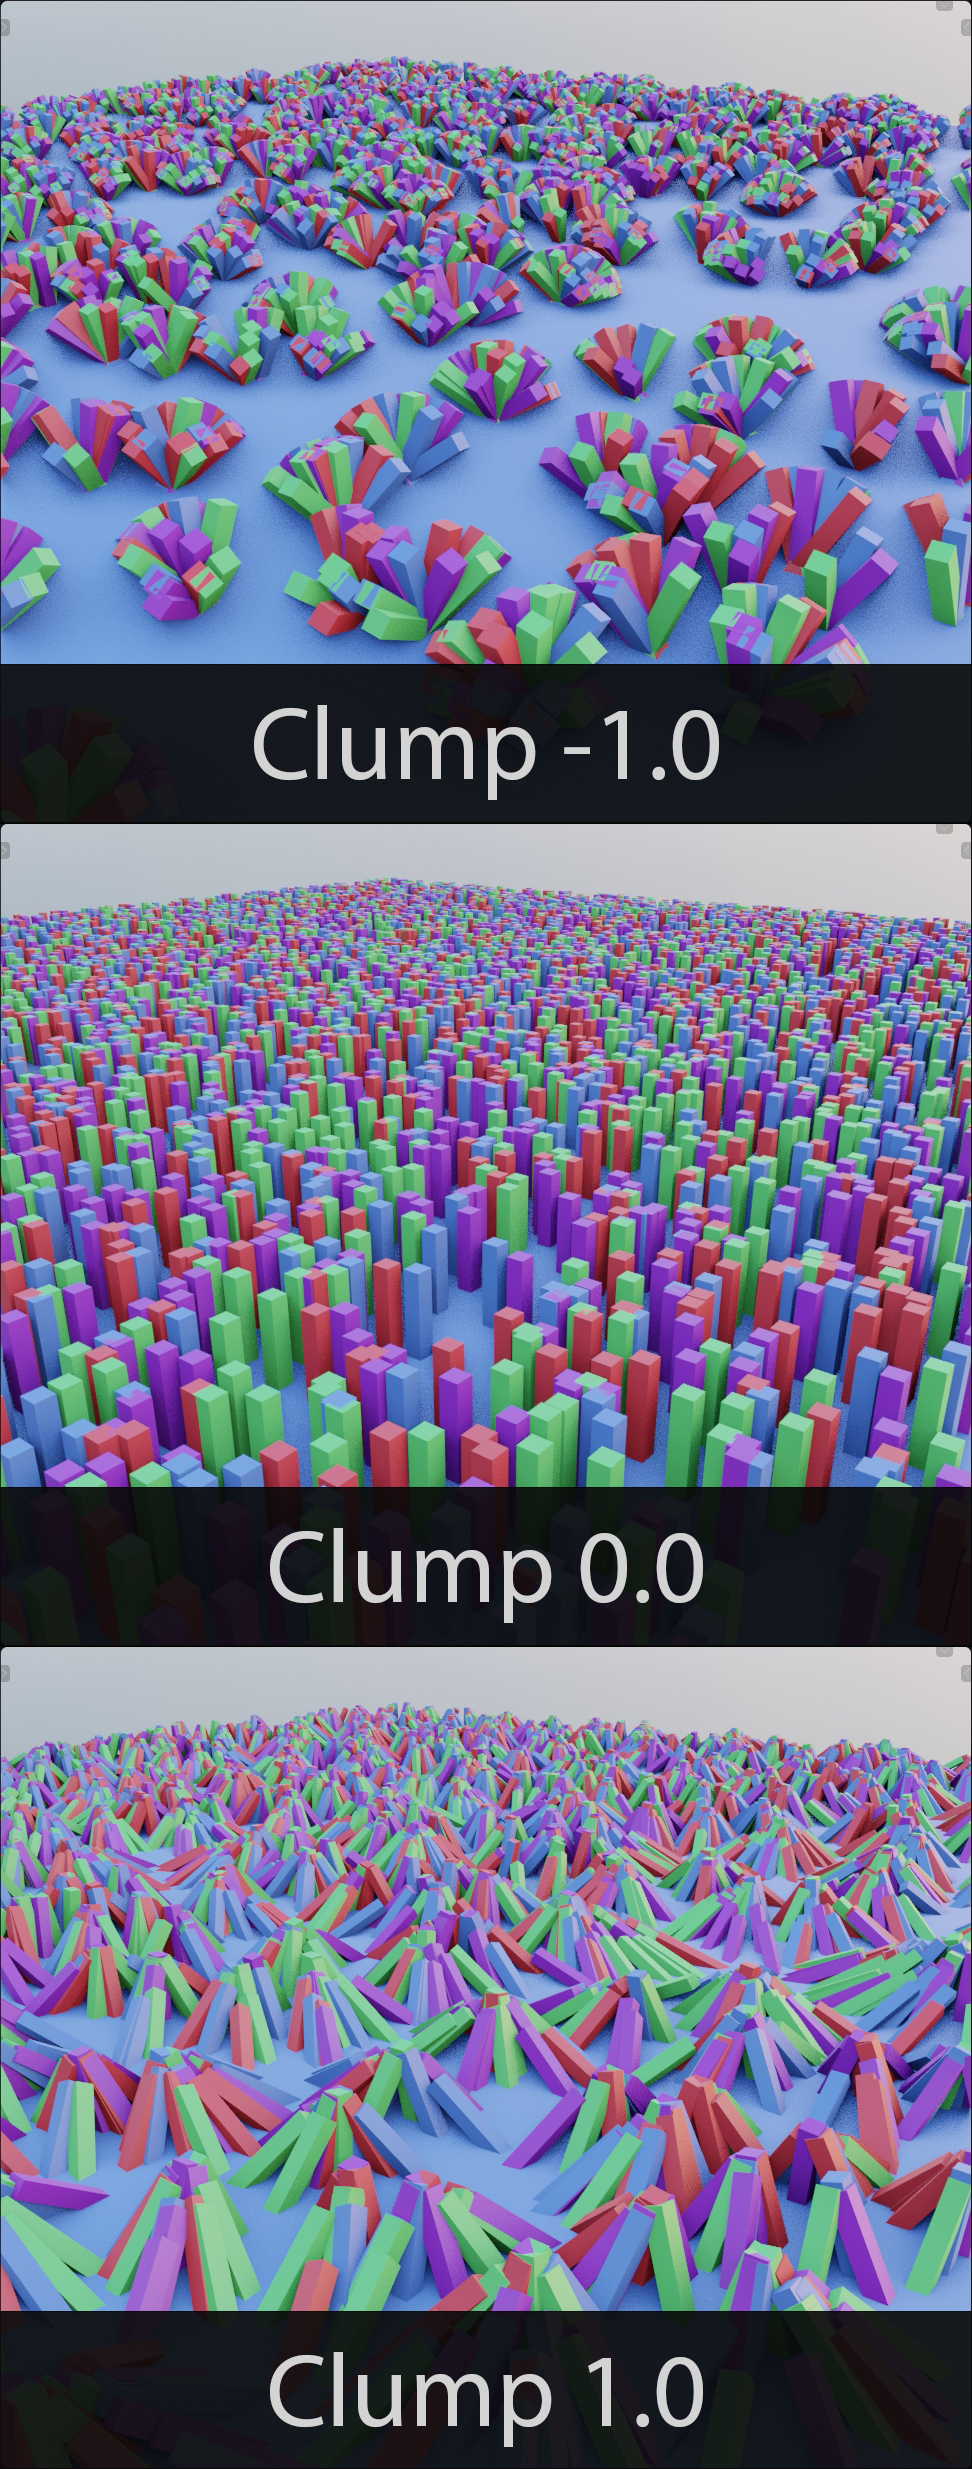
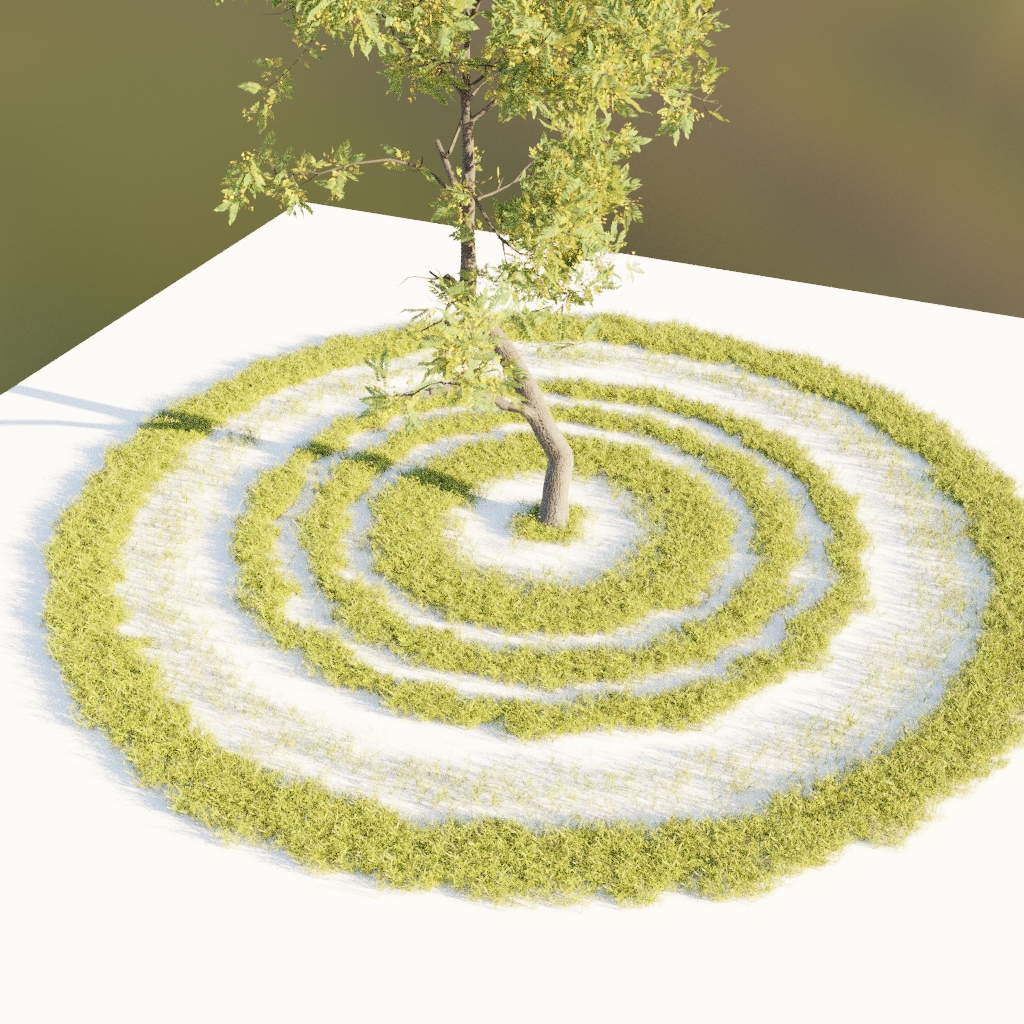
Parent Max: The maximum density of parent points. Selects parent points from the current distribution of points/instances. Points that become parent points will disappear from the scatter system.
Clump: The amount of the clumping and in what direction
- -1 clumps the bottom of each asset (ie it results in the bottom of the asset to point towards the parent point while the top points at its original location)
- 0.0 results in no clumping
- 1 clumps the top of each asset (ie it results in the top of the asset to point towards the parent point while the bottom stays where it is originally)
Modifiers
Add Modifier
Begin by adding a new modifier from the "Add Modifier" menu

On the right side is a dropdown menu button of operations for all modifiers scatter-system-wide.

- Copy All: Copy all modifiers of the active scatter system
- Paste as New: Paste the copied modifier as a completely new modifier for this scatter system
- Paste All: Paste all copied modifiers
- Paste All (Replace): Paste all copied modifiers while removing any existing scatter systems first
- Remove All: Remove all modifiers on this scatter system
- Documentation: Open this page of the documentation
Modifier Header
Each Modifier has a header that is always visible in the scatter system modifier stack even when the modifier settings are not.

Modifier Header from left to right:
Modifier Settings Toggle: Click this triangle to hide modifier settings
Modifier Icon: An icon to help distinguish modifiers
Modifier Name: You can name/rename the modifier here
Modifier Visibility Toggle: Click this eye to display or hide the modifier's effects
Modifier Operations Menu: Click to view extra functions for this modifier
- Copy: Copy this modifier to paste onto a modifier of the same type
- Paste: Paste the settings of the modifier you have copied. Enabled only if a modifier has already been copied. You can only paste onto modifiers of the same type as what you copied.
- Paste as New: Paste the copied modifier as a completely new modifier for this scatter system
- Duplicate: Make a new modifier with all the same settings as the current modifier
- Documentation: Opens up this page
Move Modifier: Clicking the up and down arrows will move the modifier up and down. Useful for adding certain modifiers after others to create more intricate scatter systems
Remove Modifier: Clicking the "x" will remove the modifier from the scatter system
- If you remove a modifier while the View Modifier Mask is on and then undo that removal you will have to turn back on the vertex viewport shading mode (viewport shading, not the mask source explained below)
Masking Settings
The following settings all mask modifiers should have:

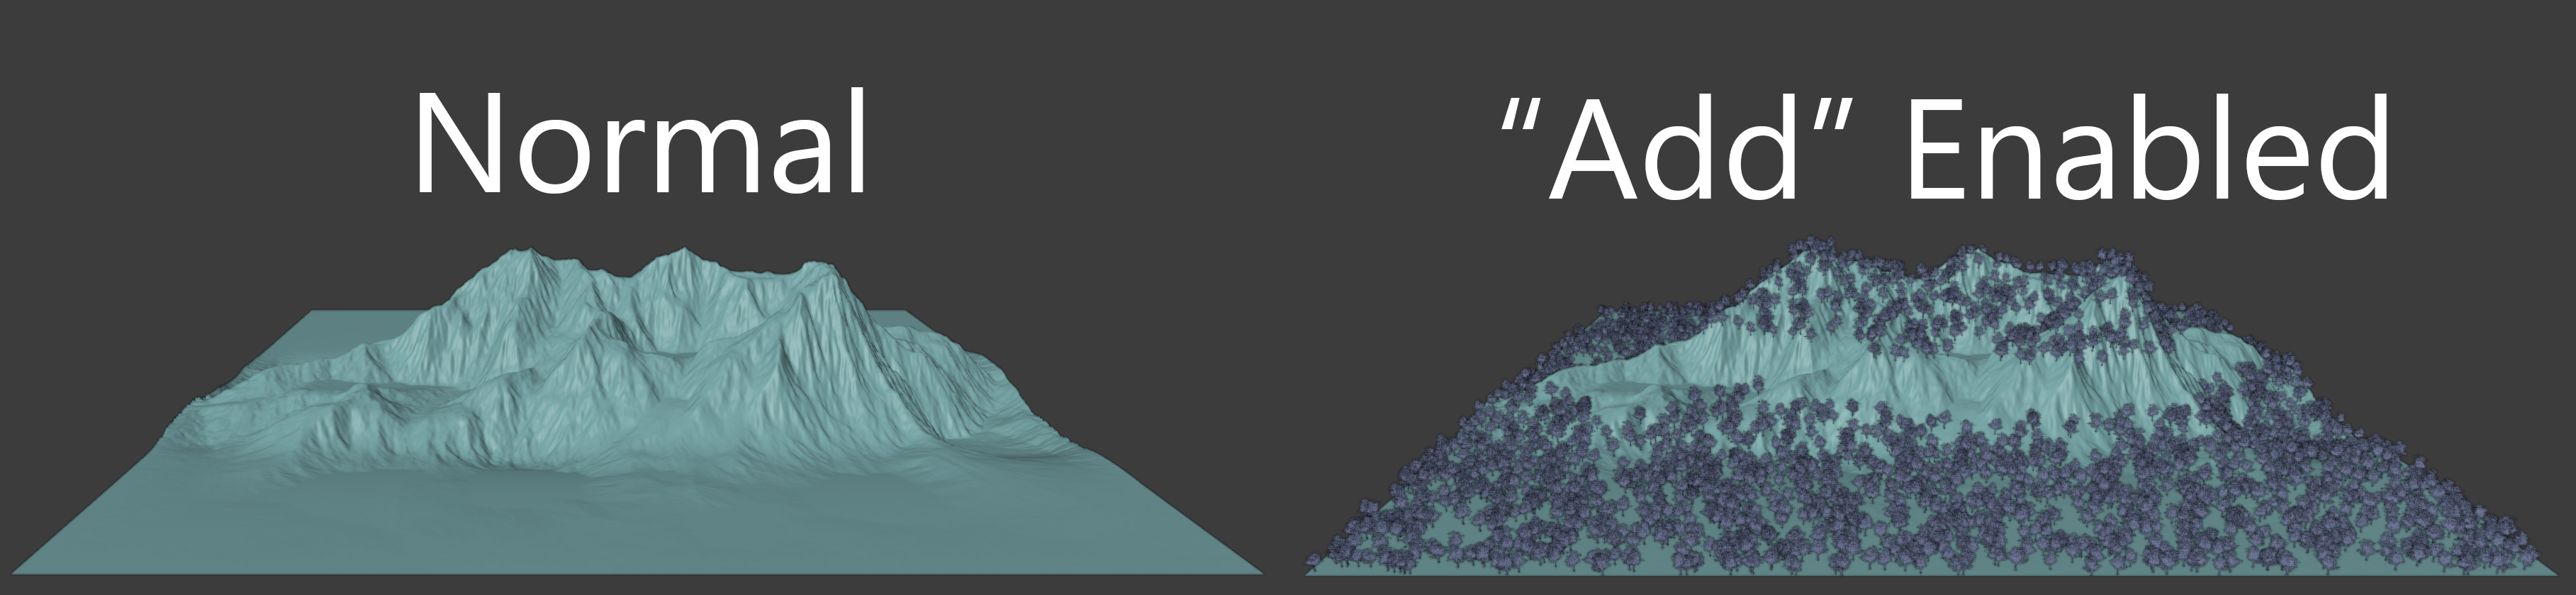
Add: Normally modifiers take away assets. Enabling Add will add back any and all assets that meet its requirements
- See the example below. This mesh has two Height Mask modifiers. Each starting and stopping outside of the other. Normally they would have to have overlap in order to have anything show up otherwise they cancel each other out. With Add enabled on the second modifier both height maps show up with a gap in the middle
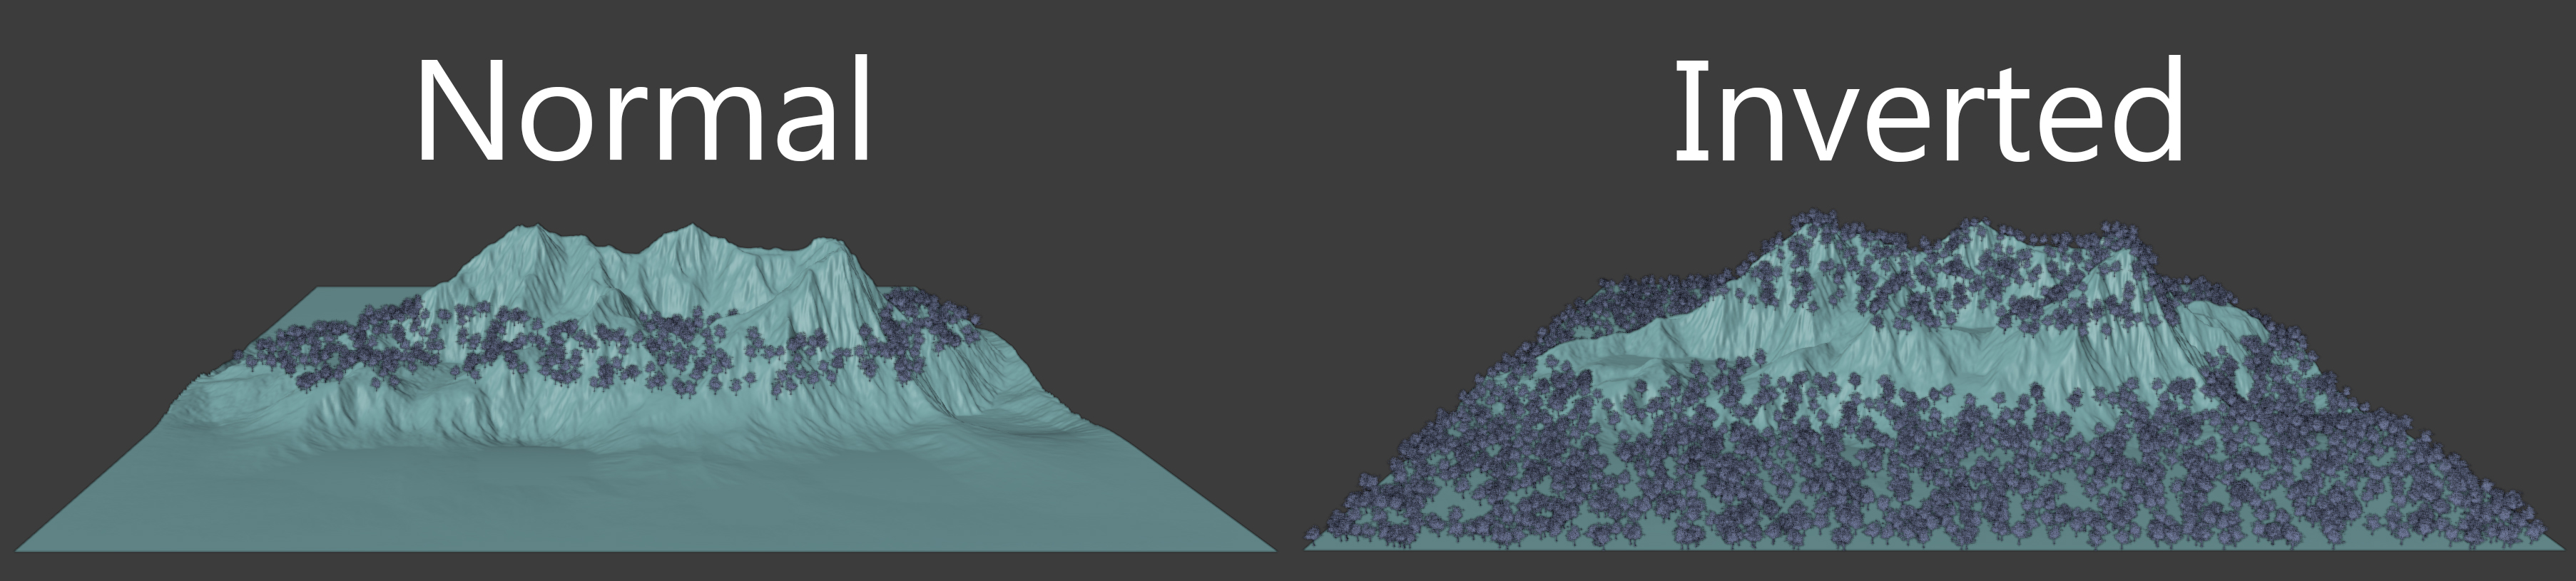
Invert: Invert the assets that are visible
Scale: Scale the assets down with the mask
Scale the mask down as it gets closer to 0. Needs falloff to be more than 0 to see results.

Falloff Curves
Randomize Edge Settings cog icon next to the falloff setting lets you customize the falloff look with a curve allowing extreme control.
When the cog is toggled on (turns blue) the falloff curve is displayed. The curve works like any other curve interface in Blender. Randomize Edge will also randomize the falloffs

Randomize Edge Settings
Many mask modifiers have the option to randomize the edges of the mask to give a more natural look

Randomize Edge Texture: This texture header gives you access to changing what texture is used for randomizing your edges. When changing settings of the Randomize Edge (such as the scale), modifiers with the same Randomize Edge Texture will also have those settings applied to them.
Randomize Edge: The amount you'd like the edge of your mask randomized
Randomize Scale: How large the Randomize Edge Texture is. Only visible if the type of texture has this setting available
Clicking the icon of two partically white bars at the far right of the Randomize Edge Texture header will display all the texture settings in the Properties panel. Here you can select a different texture type and change many other settings including the texture's color settings.
LODs
Setup a level-of-detail system.

Camera: The camera (or object) to base the LOD distance from
Level: This is the title in the top left corner of each LOD UI box letting you know what level you are working on
LOD Source: What to use for the level of detail
- Decimate: Default uses an auto-created collection of the assets with Decimate modifiers on them allowing for real-time LOD changing
- Quality Level: Select from the chosen asset's existing quality levels for this level of detail.
- Collection: Select a collection to be used for this LOD. Objects in this collection should be in the same order in the outliner as the base asset collection.
Decimate Ratio: Only when Decimate as Type. The amount to decimate the level of detail meshes
Distance: How far from the camera to stop this LOD.
Set the viewport color type to Random to be able to roughly see where your LOD's start and end.
Camera Mask
Only show assets viewable by the selected camera. Increases render times.
Camera: The camera to use for the camera mask
Padding: The distance outside of the camera view that assets will be visible even if not yet visible by the camera.
Scatter Around Camera: Distance from camera to still display objects. Camera Mask mask instances based upon their base location, not if any part of their mesh is visible in the camera. So instances close to the camera can often be masked when you'd really want them there for depth. Padding will also fix this, however, it would also display a bunch of extra instances farther away which may not be wanted. Raycast Only
Cull Backfacing: Remove instances that are on faces that face away from the camera. Typically these faces and their instances may also not be visible to the camera. This is to help until we have true object culling in geometry nodes. Raycast Only
Add Culling LOD: Enables a LOD to be used outside of the camera view/padding.
Use Culling LOD: Toggle use of the Culling LOD
Decimate Ratio: Amount to decimate the LOD's mesh (lower numbers result in greater decimation)
A big thank you to Erindale and his Tookit for the necessary node groups for the Legacy/Orginal version of this modifier! Go support him!
Scatter Around
Limit assets to a radius around assets of other scatter systems, objects, or collections

Source Type: Where to pull the source to scatter assets around
Source:
- Object: Choose an object to scatter assets around
- Vertices: Scatter around each vertex of the selected object. Results in a scatter roughly in the shape of the object
- Location: Scatter around the center of the object. Results in a scatter in a perfect circle
- Collection: Choose a collection of objects to scatter assets around
- Particles: Choose a scatter system to scatter assets around
Object (Vertices) and Collection calculate distance (radius) from each vertex giving you a more unique scatter around shape but it can be much slower if the object or collection has a lot of vertices. Particles only use the location of each particle which results in a perfectly round scatter shape. Use the Randomize settings of the Vertex mode to break that up if possible.
Radius: The distance from each source (asset location or vertex location) to limit asset scattering
Falloff: Distance to fade out the edge.
Texture: This is the texture used for randomizing the edge. It will be the same for all modifiers of the same type until Blender 3.0 (or whenever they implement the texture socket into Master)
Randomize Edge: Amount to randomize edge
Randomize Scale: Size of the noise texture for randomizing.
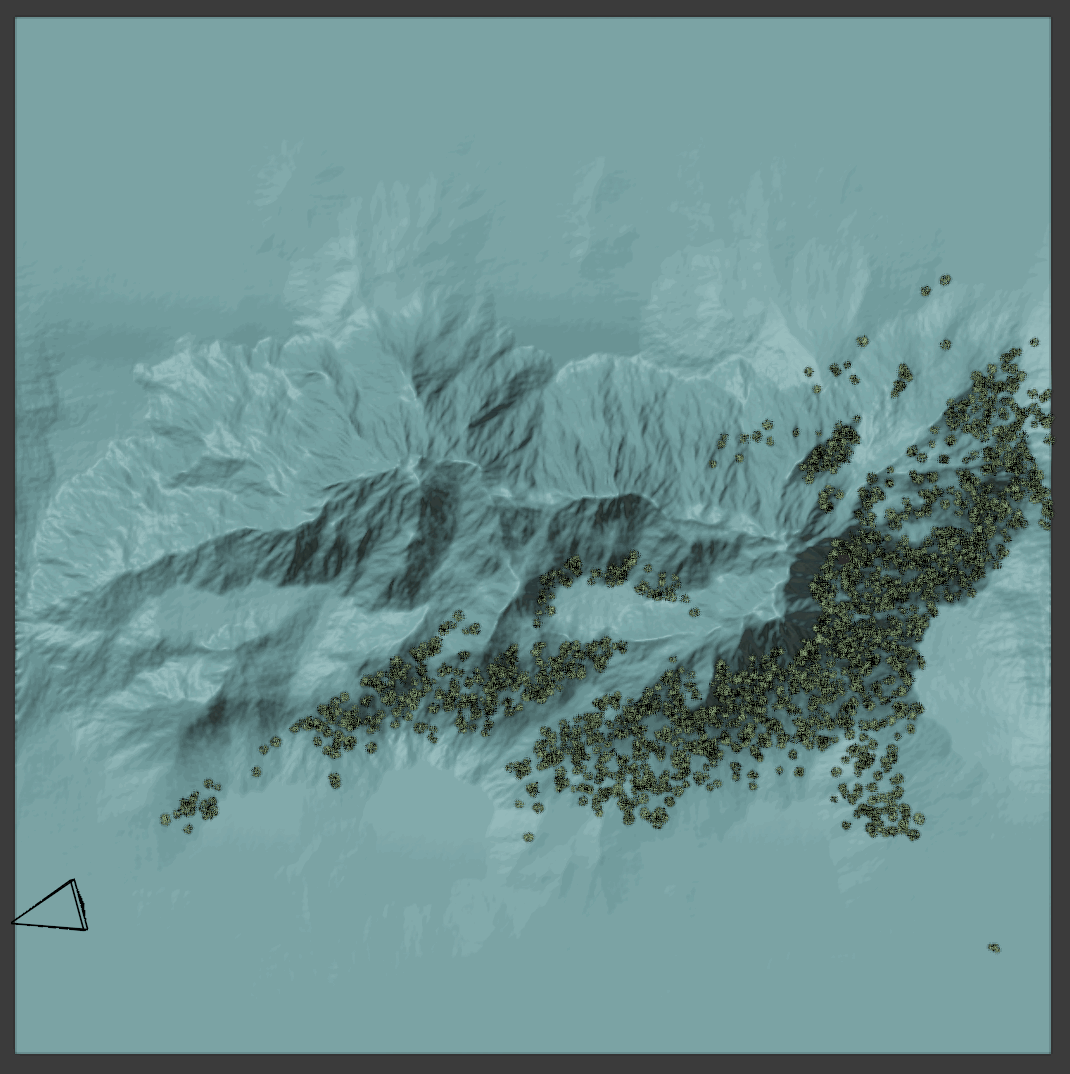
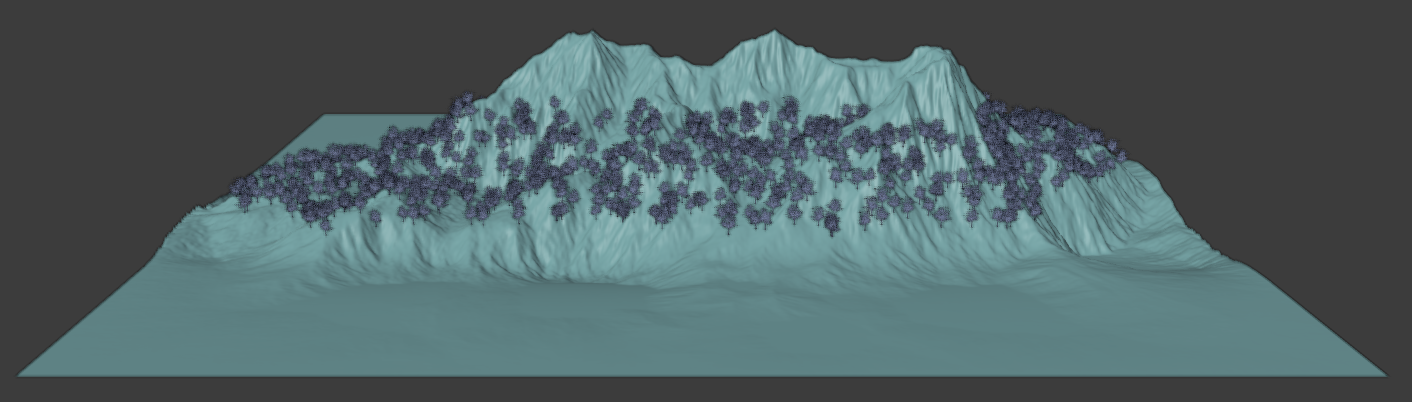
Height Mask
Limit assets to between 2 height values
Falloff: Distance to fade out from the min and max values.
Separate Falloff Values: Separate the falloffs for Min and Max values
Randomize Edge: Amount to randomize the edge
Randomize Scale: Size of the noise texture for randomizing.
Separate Randomize Values: Separate the Randomize Edge and Randomize Scale for Min and Max values
Min Height: The lowest edge
(Min) Falloff: Distance to fade out the lowest edge. Only visible if Separate Falloff Values is enabled
(Min) Randomize Edge: Amount to randomize edge the lowest edge. Only visible if Separate Randomzie Values is enabled
(Min) Randomize Scale: Size of the noise texture for randomizing. Only visible if Separate Randomzie Values is enabled
Max Height: The highest edge
(Max) Falloff: Distance to fade out the highest edge. Only visible if Separate Falloff Values is enabled
(Max) Randomize Edge: Amount to randomize the highest edge. Only visible if Separate Randomzie Values is enabled
(Max) Randomize Scale: Size of the noise texture for randomizing. Only visible if Separate Randomzie Values is enabled
Slope Mask
Limit assets to faces at a certain slope (angle). Useful for targeting ground (more horizontal faces) or cliffs (more vertical faces) if Invert is enabled.
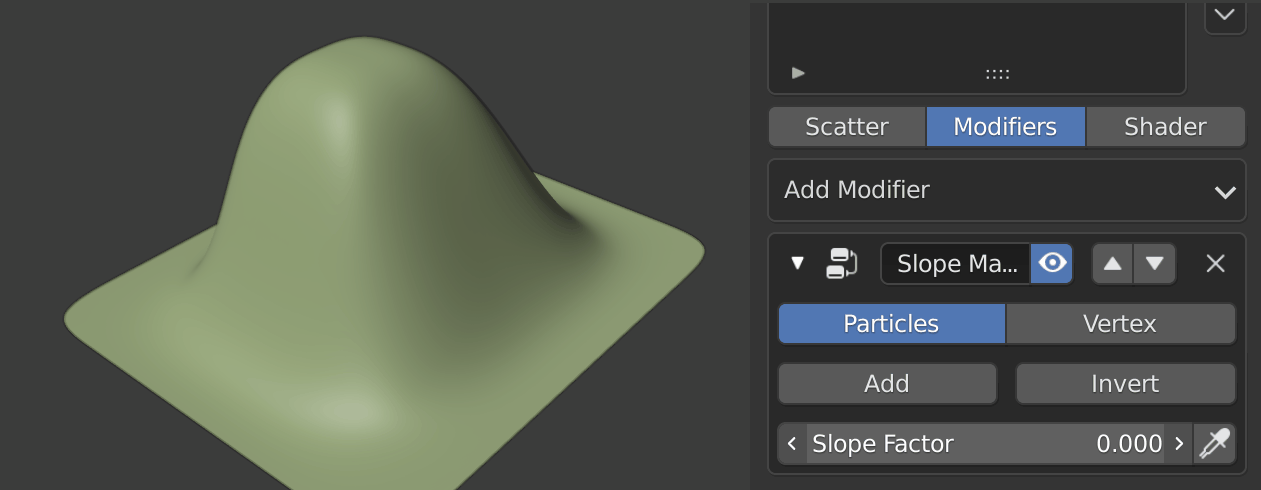
Slope Factor: The distance to accept between a face's normal and a perfectly flat normal. Will include all distances equal to or lesser than. Basically the higher the number the steeper the face that is included.
- Similar to Normal Mask but this will include faces of any orientation that also are included in the slope factor, whereas Normal Mask includes orientation of the face, not just angle/slope.
Slope Picker: Pick the slope you want by clicking on the faces/are you'd like to include
- See Normal Mask for a demonstration of the picker. It'll be for the Normal Mask of course but they work very similarly
Falloff: Distance to fade out edge
Texture: This is the texture used for randomizing the edge. It will be the same for all modifiers of the same type until Blender 3.0 (or whenever they implement the texture socket into Master)
Randomize Edge: Amount to randomize edge
Randomize Scale: Size of the noise texture for randomizing.
Normal Mask
Limit assets to faces of a given Normal within the threshold distance. Useful for targeting specific sides of a mountain, tree, or rock or anything else.
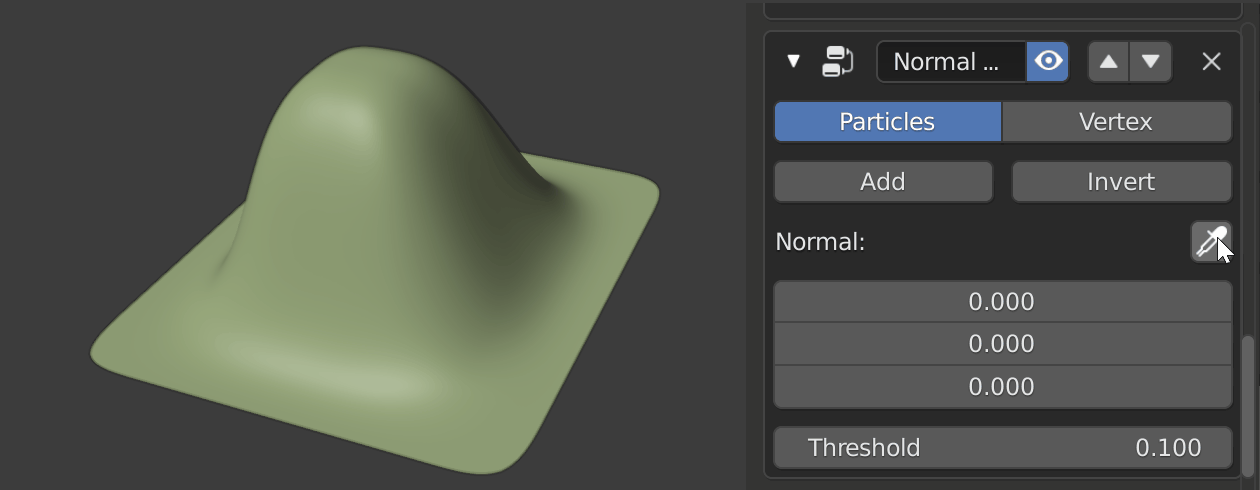
Normal: The normal you'd like to target.
Normal Picker: Normals aren't user-friendly so we've given you this tool to easily sample the normals you'd like to target. Simply click the eyedropper next to the title "Normal" and then click somewhere on your mesh to sample that face's normal value.
Threshold: How close a face's normal can be to the target normal to be included in the mask.
Falloff: Distance to fade out edge
Texture: This is the texture used for randomizing the edge. It will be the same for all modifiers of the same type until Blender 3.0 (or whenever they implement the texture socket into Master)
Randomize Edge: Amount to randomize edge
Randomize Scale: Size of the noise texture for randomizing.
Path Mask
Limit assets to be within a distance of a given object (path)
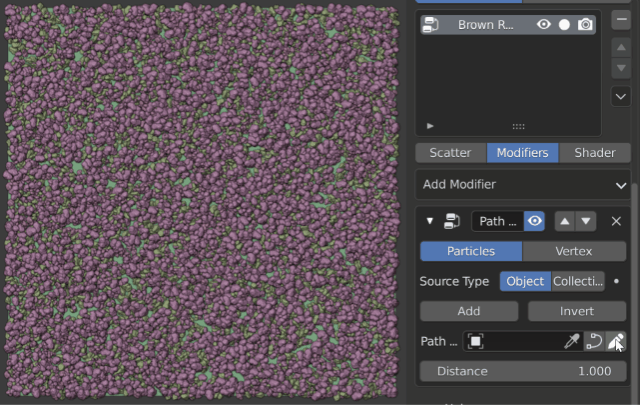
Source Type: What the modifier should use as the path
Path (Object/Collection): The path object(s)
- Object: The mesh object to use for the path
- Collection: A collection of meshes to use for paths
Add Curve Path: Set up a mesh line that will follow a given curve. The mesh object will be hidden and the curve is shown. However, it must be the mesh object that is inputted into the "Path Object". Editing the curve will change the path mask. If there already is a curve-mesh combo created by the modifier, whether by Add Curve Path or Draw Path it will switch this modifier over to collection and input the correct collection into the Path Collection.
Draw Path: Draw a path to turn it into a curve and use it as the path. After drawing click Enter to apply. Click the Right Mouse Button or Esc key to cancel at any time. Results in an editable curve. Editing the curve will change the path mask. If there already is a curve-mesh combo created by the modifier, whether by Add Curve Path or Draw Path it will switch this modifier over to collection and input the correct collection into the Path Collection.
Distance: The distance from the path object to hide assets (Enable Invert to show assets in the path)
Falloff: Distance to fade out the edge
Texture: This is the texture used for randomizing the edge. It will be the same for all modifiers of the same type until Blender 3.0 (or whenever they implement the texture socket into Master)
Randomize Edge: Amount to randomize edge
Randomize Scale: Size of the noise texture for randomizing.
Texture Mask
Texture Type: This is the type of texture currently being used. Here you can choose other textures.
Split Texture Channels: Use the color (yellow) output of the selected texture type and choose what RGB channel to use for the mask. If off will use the Value or Fac (grey) output of the selected texture type.

----- Texture Settings -----
Here you'll see the settings for the active texture type. The settings you'll see should be exactly what you see on the geometry node of that type. See the Blender Docs for individual setting descriptions
Texture Mapping: How the texture is applied to the scatter system
- Position: This feeds the position of each particle into the texture formula
- UVMap: Feeds the selected UV Map into the texture formula and maps that back onto the scatter system. Best for Image or Movie texture type
Setup Image Paint: Sets up an image, applies it to this modifier and enters into Texture Paint Mode. White will be where assets are placed, black will be where they aren't. Image Type set to Image
In order to get realtime updates like in the example open and close User Preferences. Not sure why but that seems to get the auto update working.
Remap Values: Map the texture's values to new values
- Map Range: Remap the values from a range to a target range. Map Range Settings
- Curve: Map the texture's value to a curve and outputs those remapped values. Curve Settings
- Ramp: Map values to other values with the use of a gradient. Get's the grayscale equivalent (average of the RGB channels) if using a color. Ramp Settings
Transform: Manually move the texture around in 3D Space. If the texture is set to something other than 3D the irrelevant transform channels probably won't change much.
Distance Mask
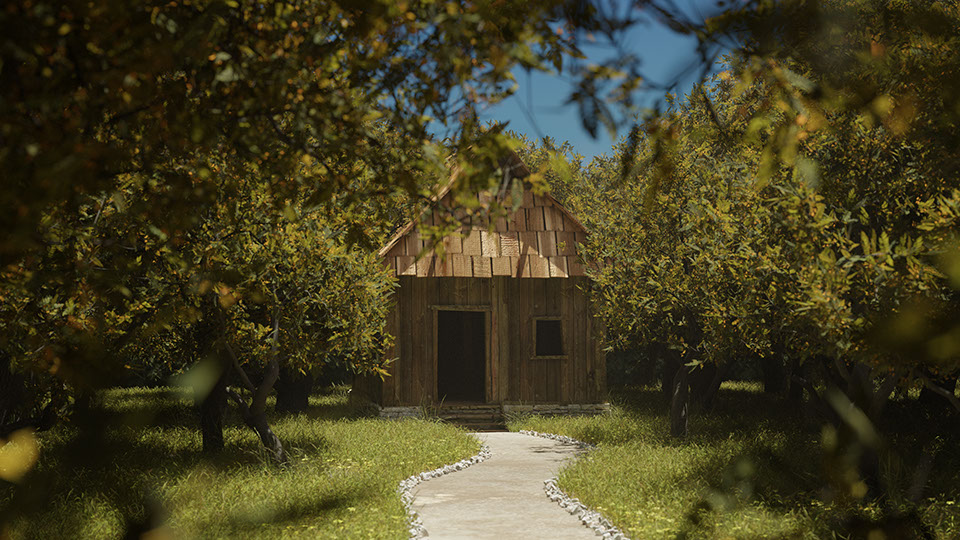
Fade instances out from a given object's location. Great for grass. Usually, you can get away with having less dense grass the farther away from the camera you go allowing you to use fewer particles than normal with the same visual effect.
Object: The object to use when pulling location
Distance: How far from the object's location over which to fade particles out
Min Density: The density multiplier at the full distance and to eternity
Max Density: The density multiplier at the object
Falloff Curve: Manipulate how quickly the assets fade out
Follow Object
Follow Object lets you have objects always face an object. Example: Billboard assets always face the camera
Object: The object the assets should always face
Rotate 90deg: Just in case the assets are facing perpendicular to the way you would like for them to be you can click this toggle and they'll rotate 90 degrees and face the correct angle
Simple Wind
Rotates each instance in a way that looks like wind blowing. This is a close approximation of a wind simulation, allowing for faster response and stability, over something like the old hair particle physics.
Speed: How fast to rotate back and forth
Lean Amount: The amount to lean your assets. Useful to make your wind look stronger with a higher Wind Speed and lower Variance
Lean Add: Manually lean your assets more for artistic control.
Direction: The direction the wind is to blow
Bounce Back Multiplier: The amount the assets can "bounce back" after being "blown" down. 0 = straight up and down, 1 = fully going the opposite direction
Turbulence Amount: This is the depth or level of wind turbulence. Higher numbers result in smaller waves or less rolling waves and more individual assets moving differently than their neighbours
Turbulence Size: How big the "waves" are. Will affect the speed as well.
Shaders
On the shader tab of the Assets panel, you will see the options for changing how the assets look. The specific settings will change for each asset.
There may be more than one available shader per asset, this is the case for Trees, as they consist of a material for the Tree, and a separate material for the leaves and twigs.
Shaders usually consist of:
- Wetness (makes the asset look wet)
- HSL values allow the user control over colour correction.
- Displacement or Normal map control
Some assets have shader values for:
- SSS (Subsurface scattering) allows light to pass through the surface of the asset
- Snow (which scatters snow on the Z normals of the object mimicking snow-fall)
- AO based dirt (This can be slow as it calculates AO of the mesh normals, and applies a mask to that area for dirt distribution)
- Random seed values, for randomly changing the surface details, colour variations, and texture placement. (This only works on assets that use procedural shaders)
If the Scatter Quality Proxy toggle is on, there will be a switch for the user to toggle between the shaders on the objects you see in the viewport and shaders on the objects that will be used when rendering.
Place
Click to place individual objects onto the selected object. This is not a scatter or particle system. So you will not be able to change the settings of the placed objects all at once after placing. You'll have to go through and offset, scale, and rotate individually.
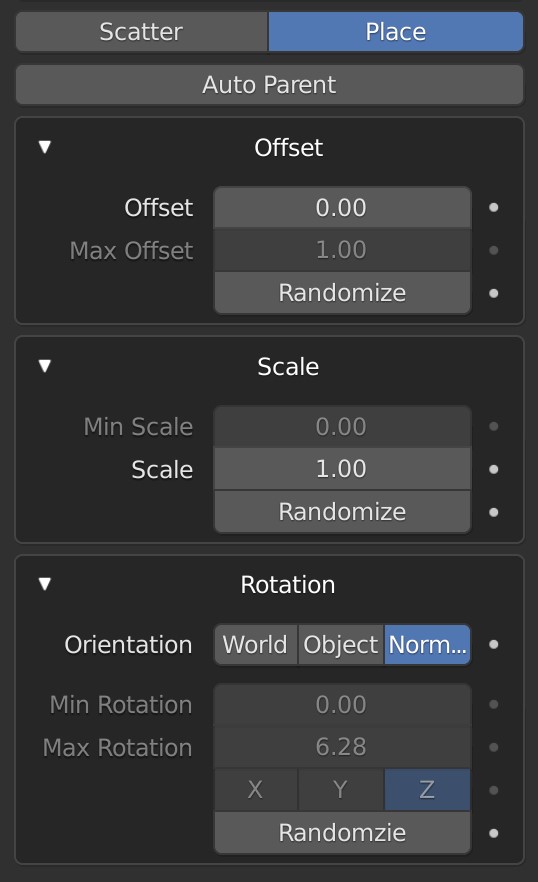
Auto Parent: Automatically parent placed objects to the selected object.
----- Offset Settings -----
(Min) Offset: The base amount to offset. If Randomize is enabled this setting acts as the minimum amount to randomize the offset for each object.
Max Offset: The maximum amount to randomize the offset for each object.
Randomize: Randomize the offset amount for each object placed
----- Scale Settings -----
Min Scale: The minimum amount to randomize the scale for each object.
(Max) Scale: The base amount to scale each object. If Randomize is enabled this setting acts as the maximum amount to randomize the scale for each object.
Randomize: Randomize the scale amount for each object placed
----- Rotation Settings -----
Orientation: Orient the objects according to this setting
- World: Orient each object so that up is the world's up.
- Object: Orient each object to match the selected object's rotation.
- Normal: Orient each object to match the normal of the face it is placed upon. Only affects the initial placement. The object's rotation will not update if the underlying geometry, and therefore the face normal, changes
Min Rotation: The minimum amount to randomize the scale for each object.
Max Rotation: The maximum amount to randomize the offset for each object.
Randomize Axes: The Euler axis to rotate randomly around (Z is up)
Randomize: Randomize the rotation amount for each object placed
Undoing (CTRL-Z) is disabled while placing due to a bug in Blender's code that will crash Blender
Once a rotation orientation value is selected before placing. Changing this value, WILL NOT affect objects placed in previous commands
Defaults
If enabled will add assets with the given default values
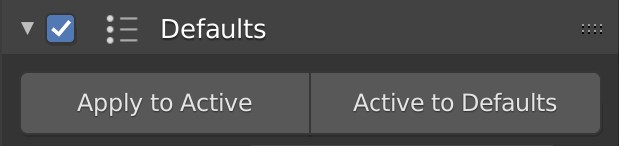
Enable Defaults: Click the Toggle next to the dropdown arrow to enable defaults. Defaults will not be applied unless enabled.
Presets: Manage presets. Presets are unique to the scatter type (in the addon preferences) you have selected
Apply to Active: Apply the current defaults to the active scatter/particle system
Active to Defaults: Save the current settings as defaults